Sampling the Gamelan
Deadline
start of Week 5: 29 Sept.
Introduction
In this collaborative exercise, the class will work in teams to create a comprehensive sample library of the Bates gamelan. Each team will be responsible for recording a group of assigned instruments from the Bates gamelan room.
This assignment develops skills in microphone placement, gain staging, recording, file editing, and documentation. The end result will be a shared, well-organized sample library that you and your classmates can use in later projects, which can be made available to future generations of Bates Sound Studio musical creators as well.
Learning Objectives
By completing this assignment, students will be able to:
- Demonstrate careful microphone placement and gain staging in a live room environment.
- Perform basic percussion technique on gamelan instruments by striking and damping correctly.
- Capture multiple types of strikes and excitation methods across a family of gamelan instruments.
- Apply consistent editing practices so that samples start with a clear attack and end after the natural resonance fades.
- Organize files according to a strict naming convention for usability.
- Collaborate in teams to contribute to a class-wide sample library.
Assignment Instructions
Step 1: Team Assignments
- The class will be divided into teams, each responsible for a group of gamelan instruments (e.g., saron, bonang, kenong, gongs).
- Each team ensures all pitches in their assigned group are recorded and indexed. To be sure, your task is to record all notes available on your assigned instruments, at different dynamic levels and using different playing tecnniques (as described below).
Teams and Instruments
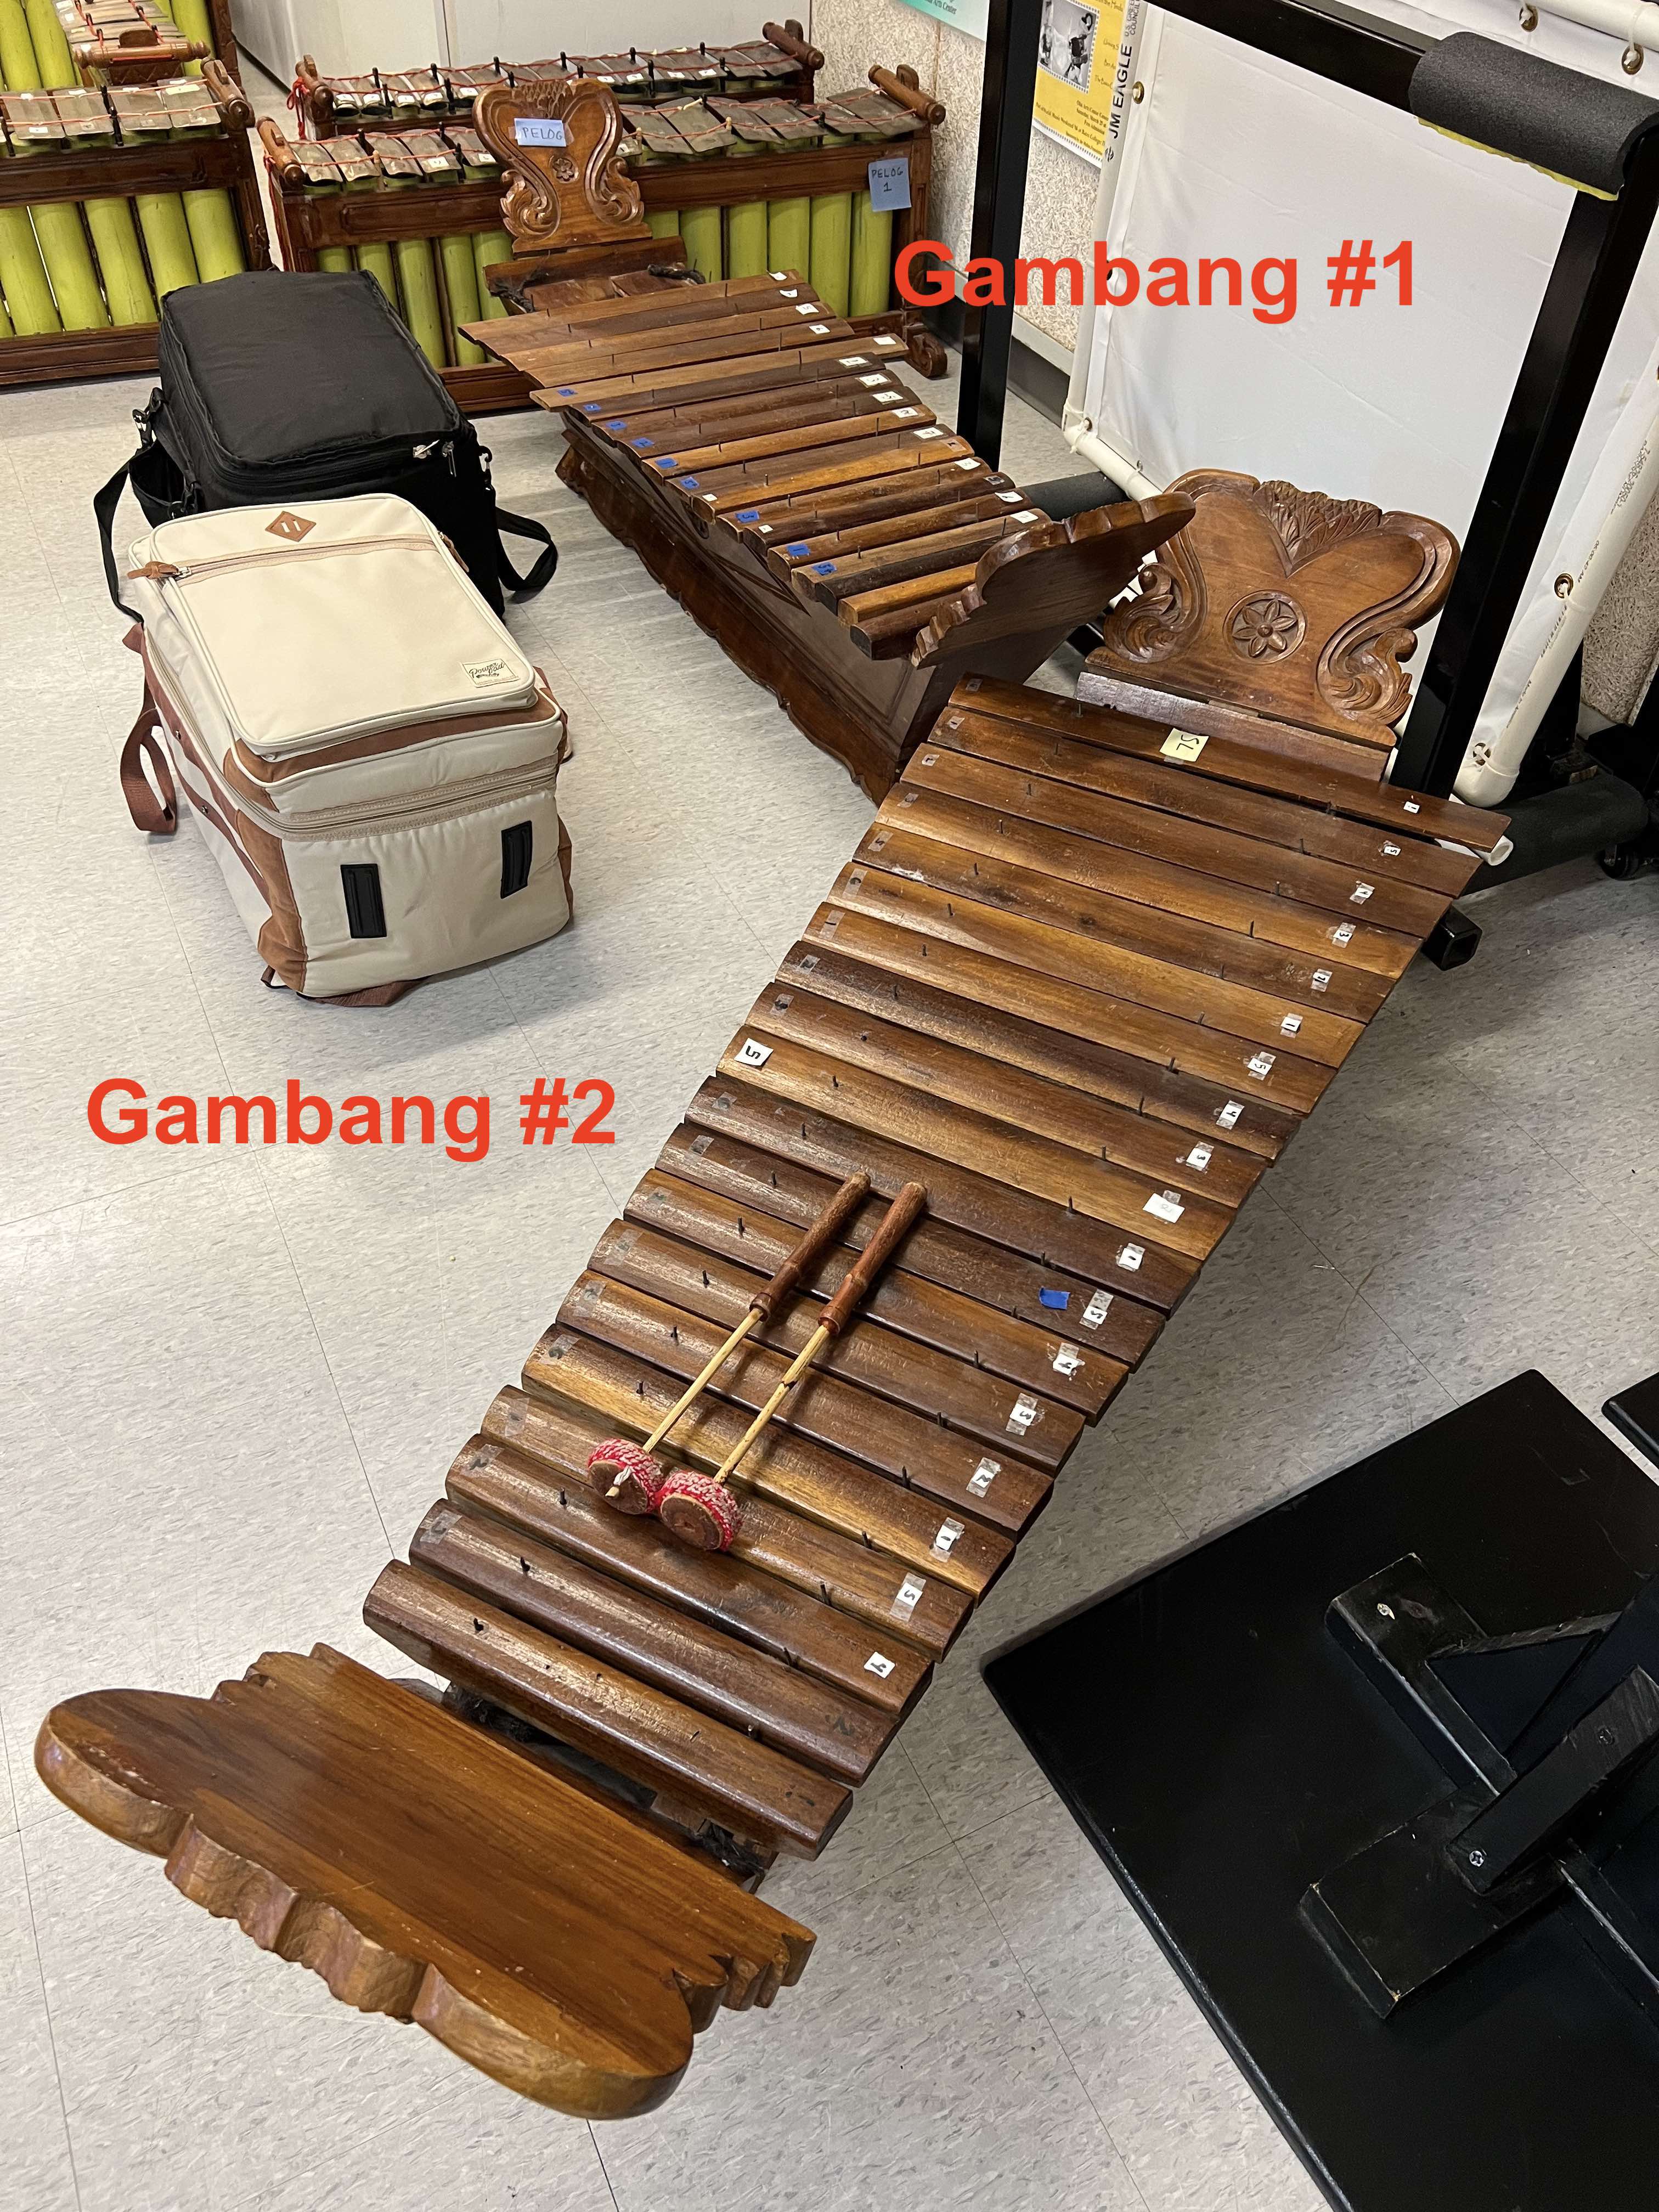
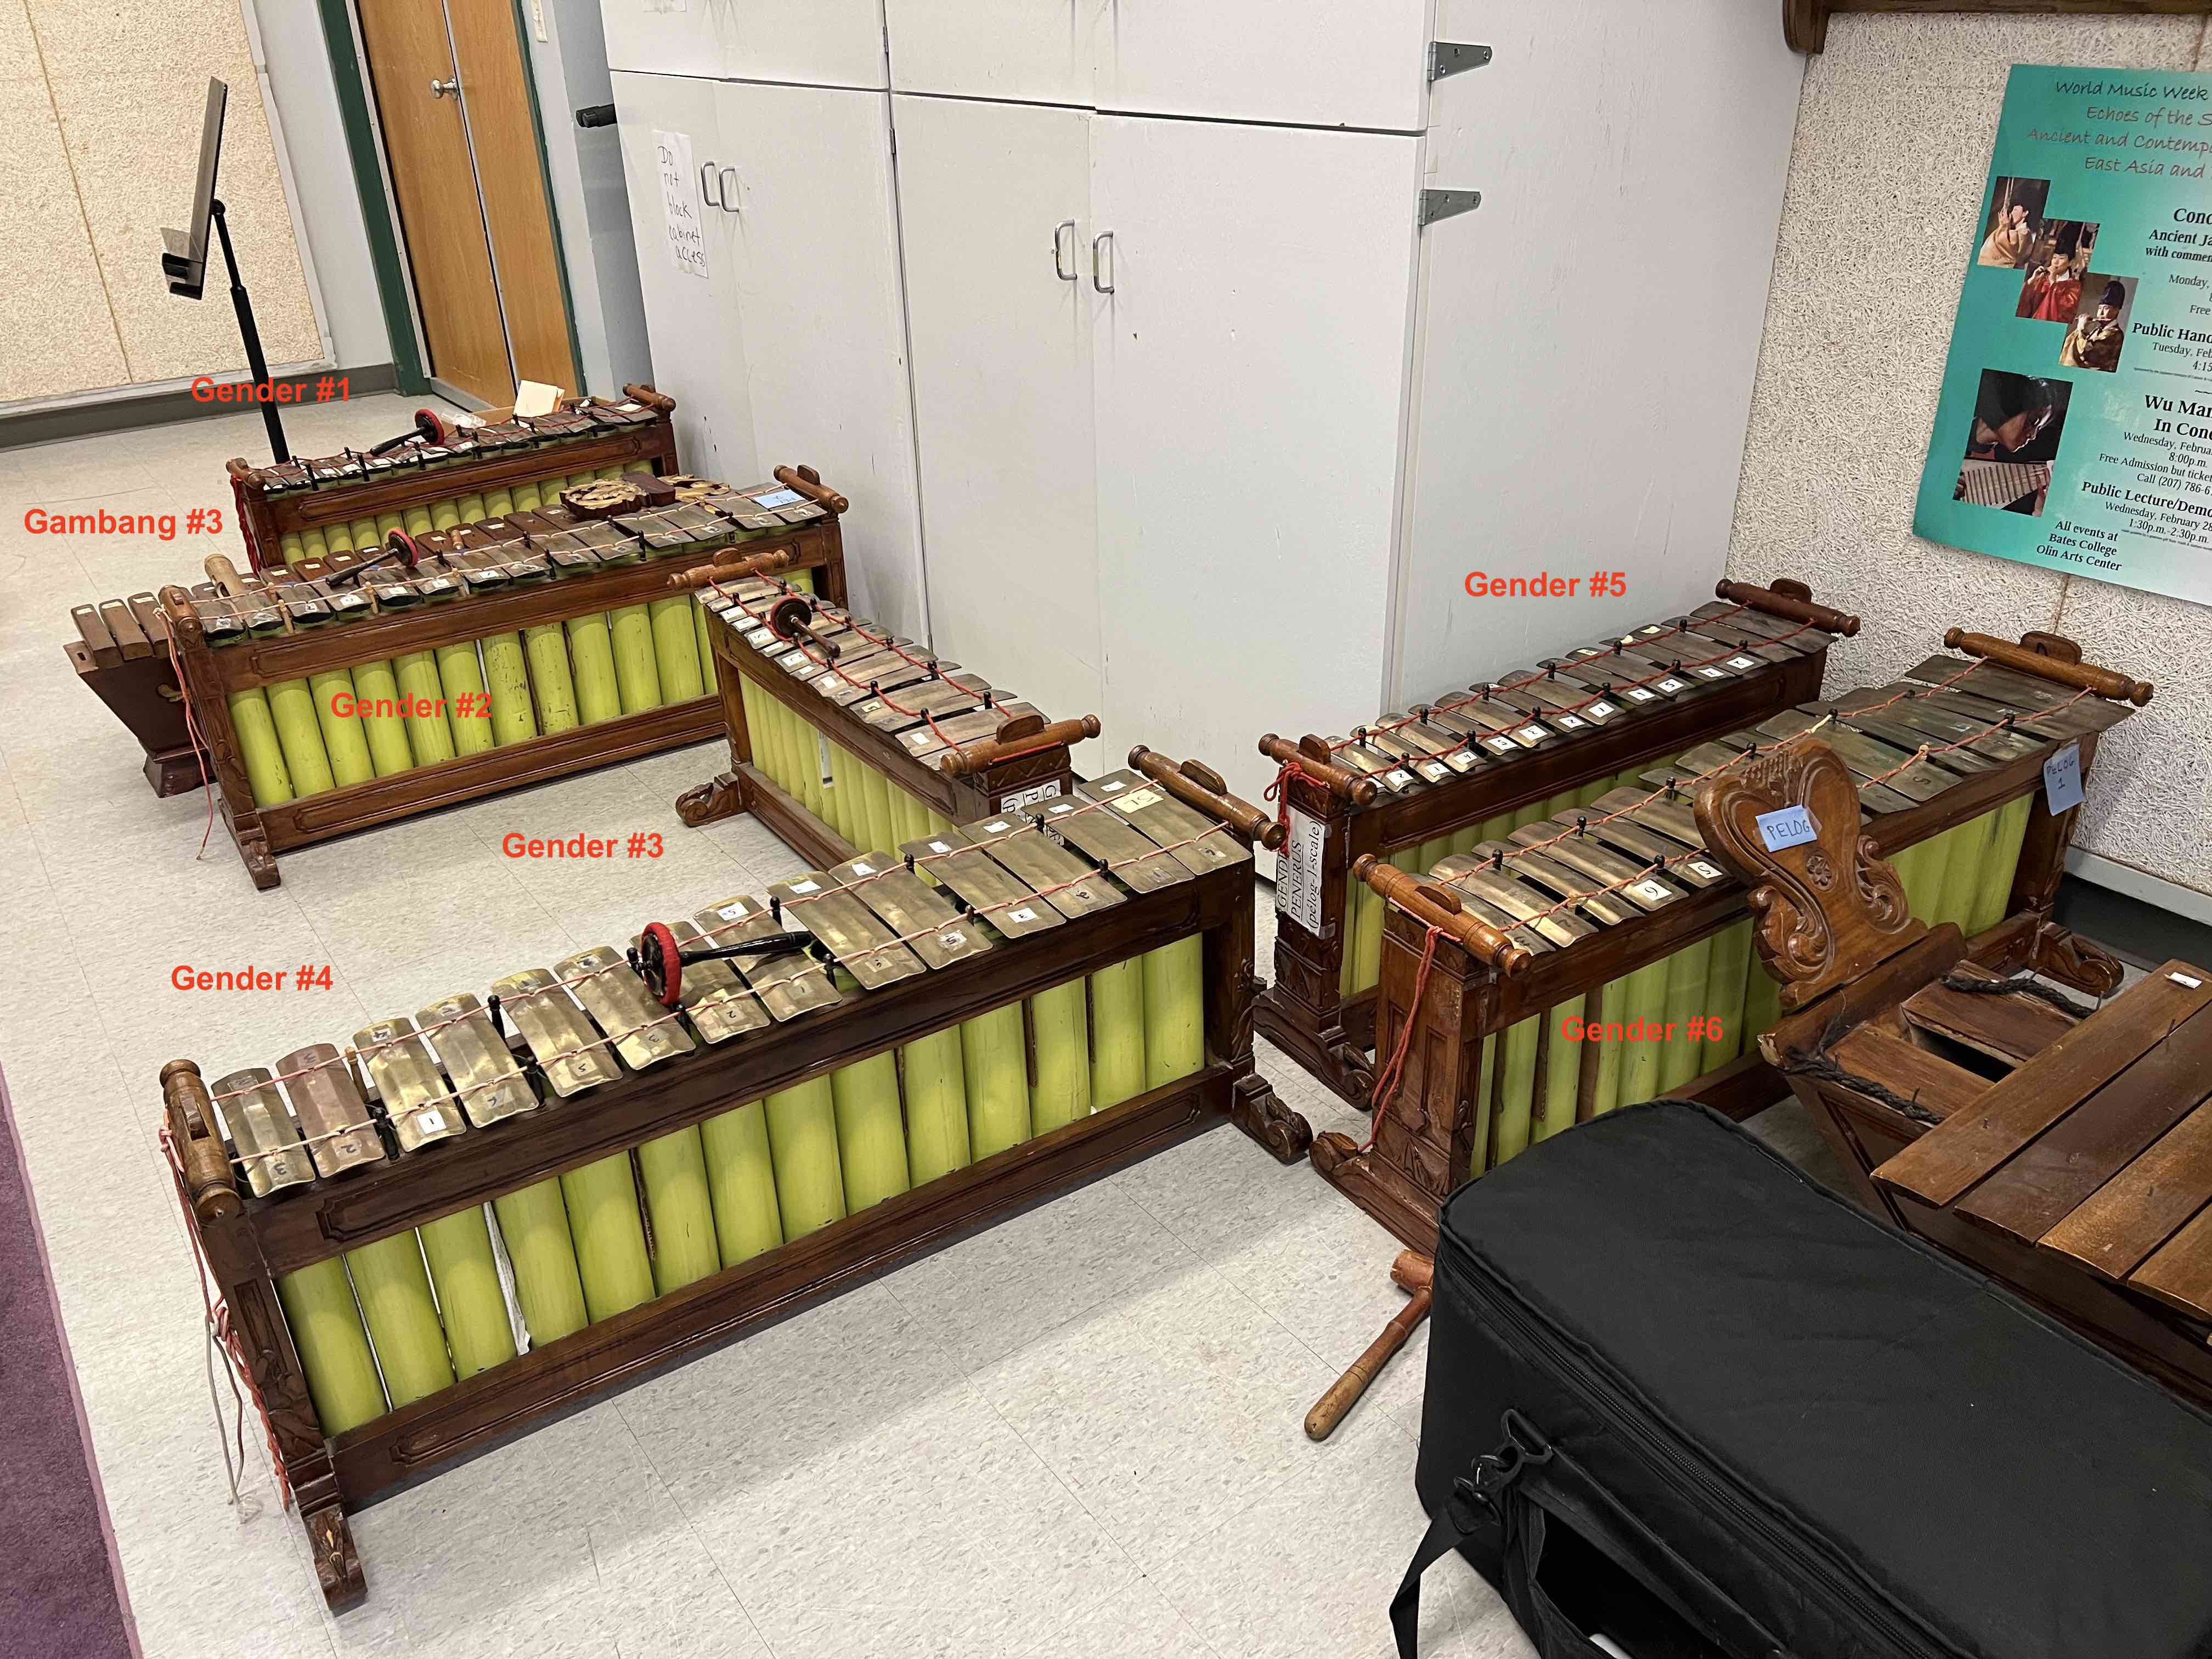
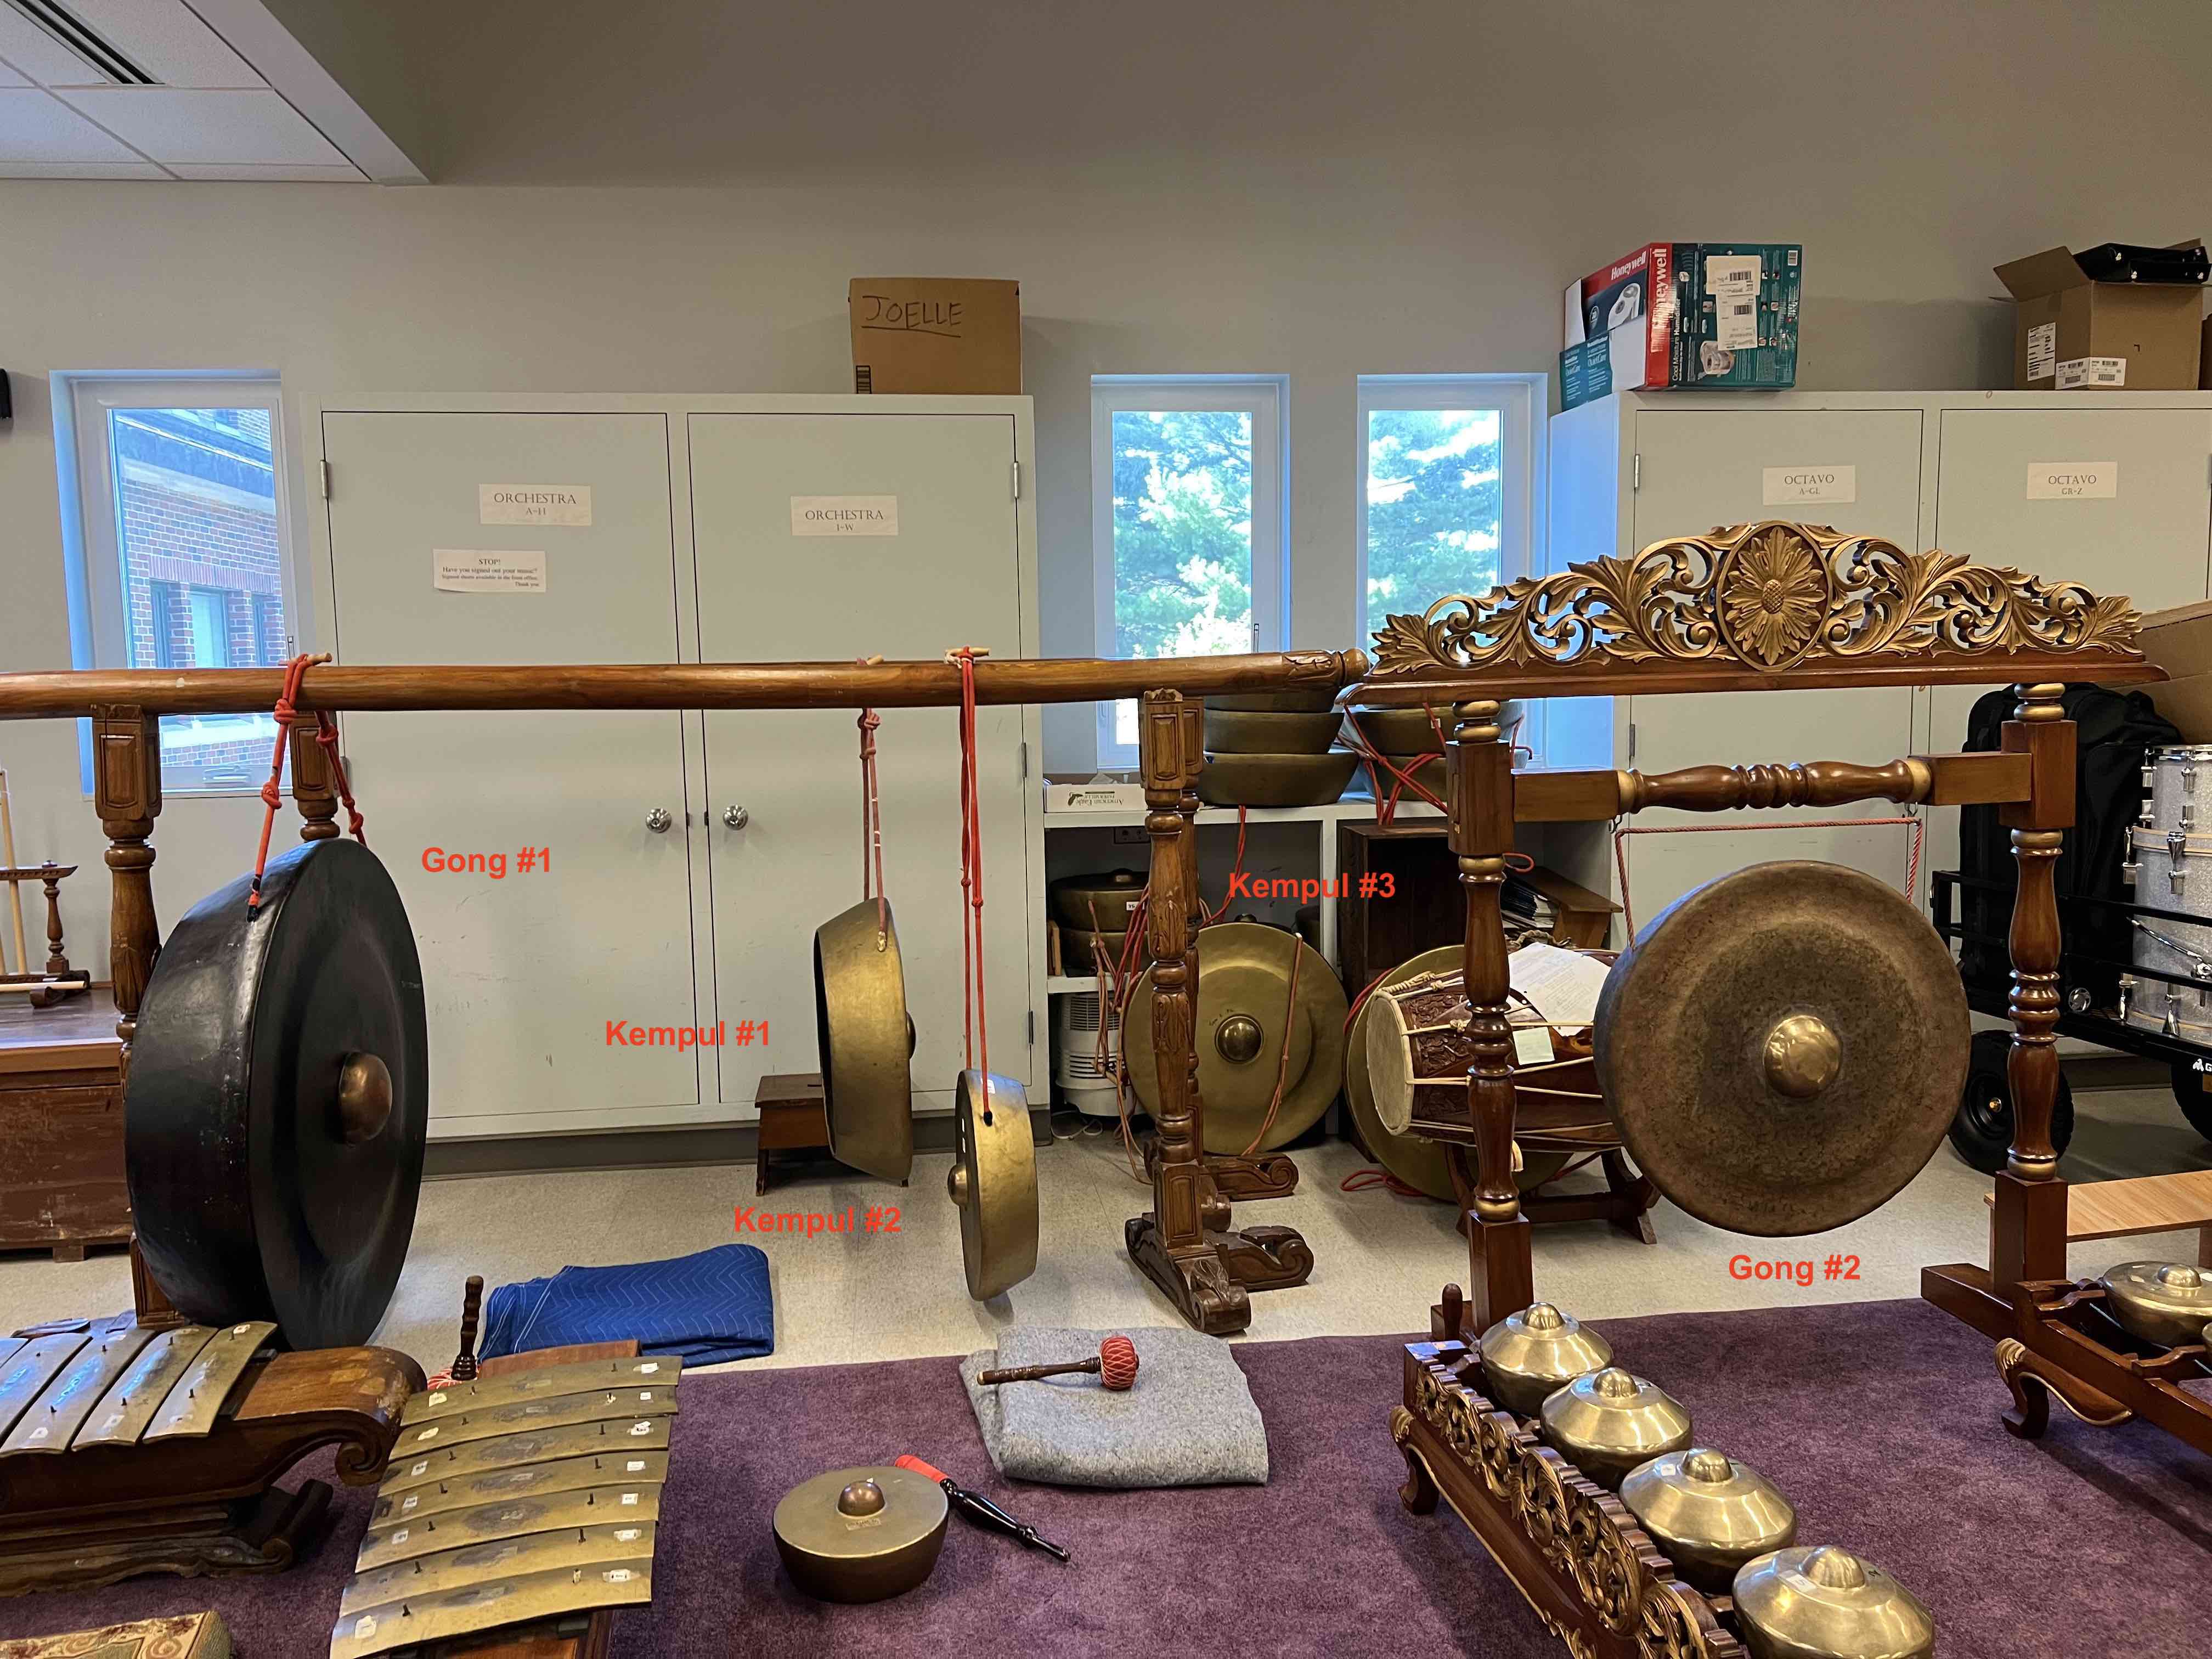
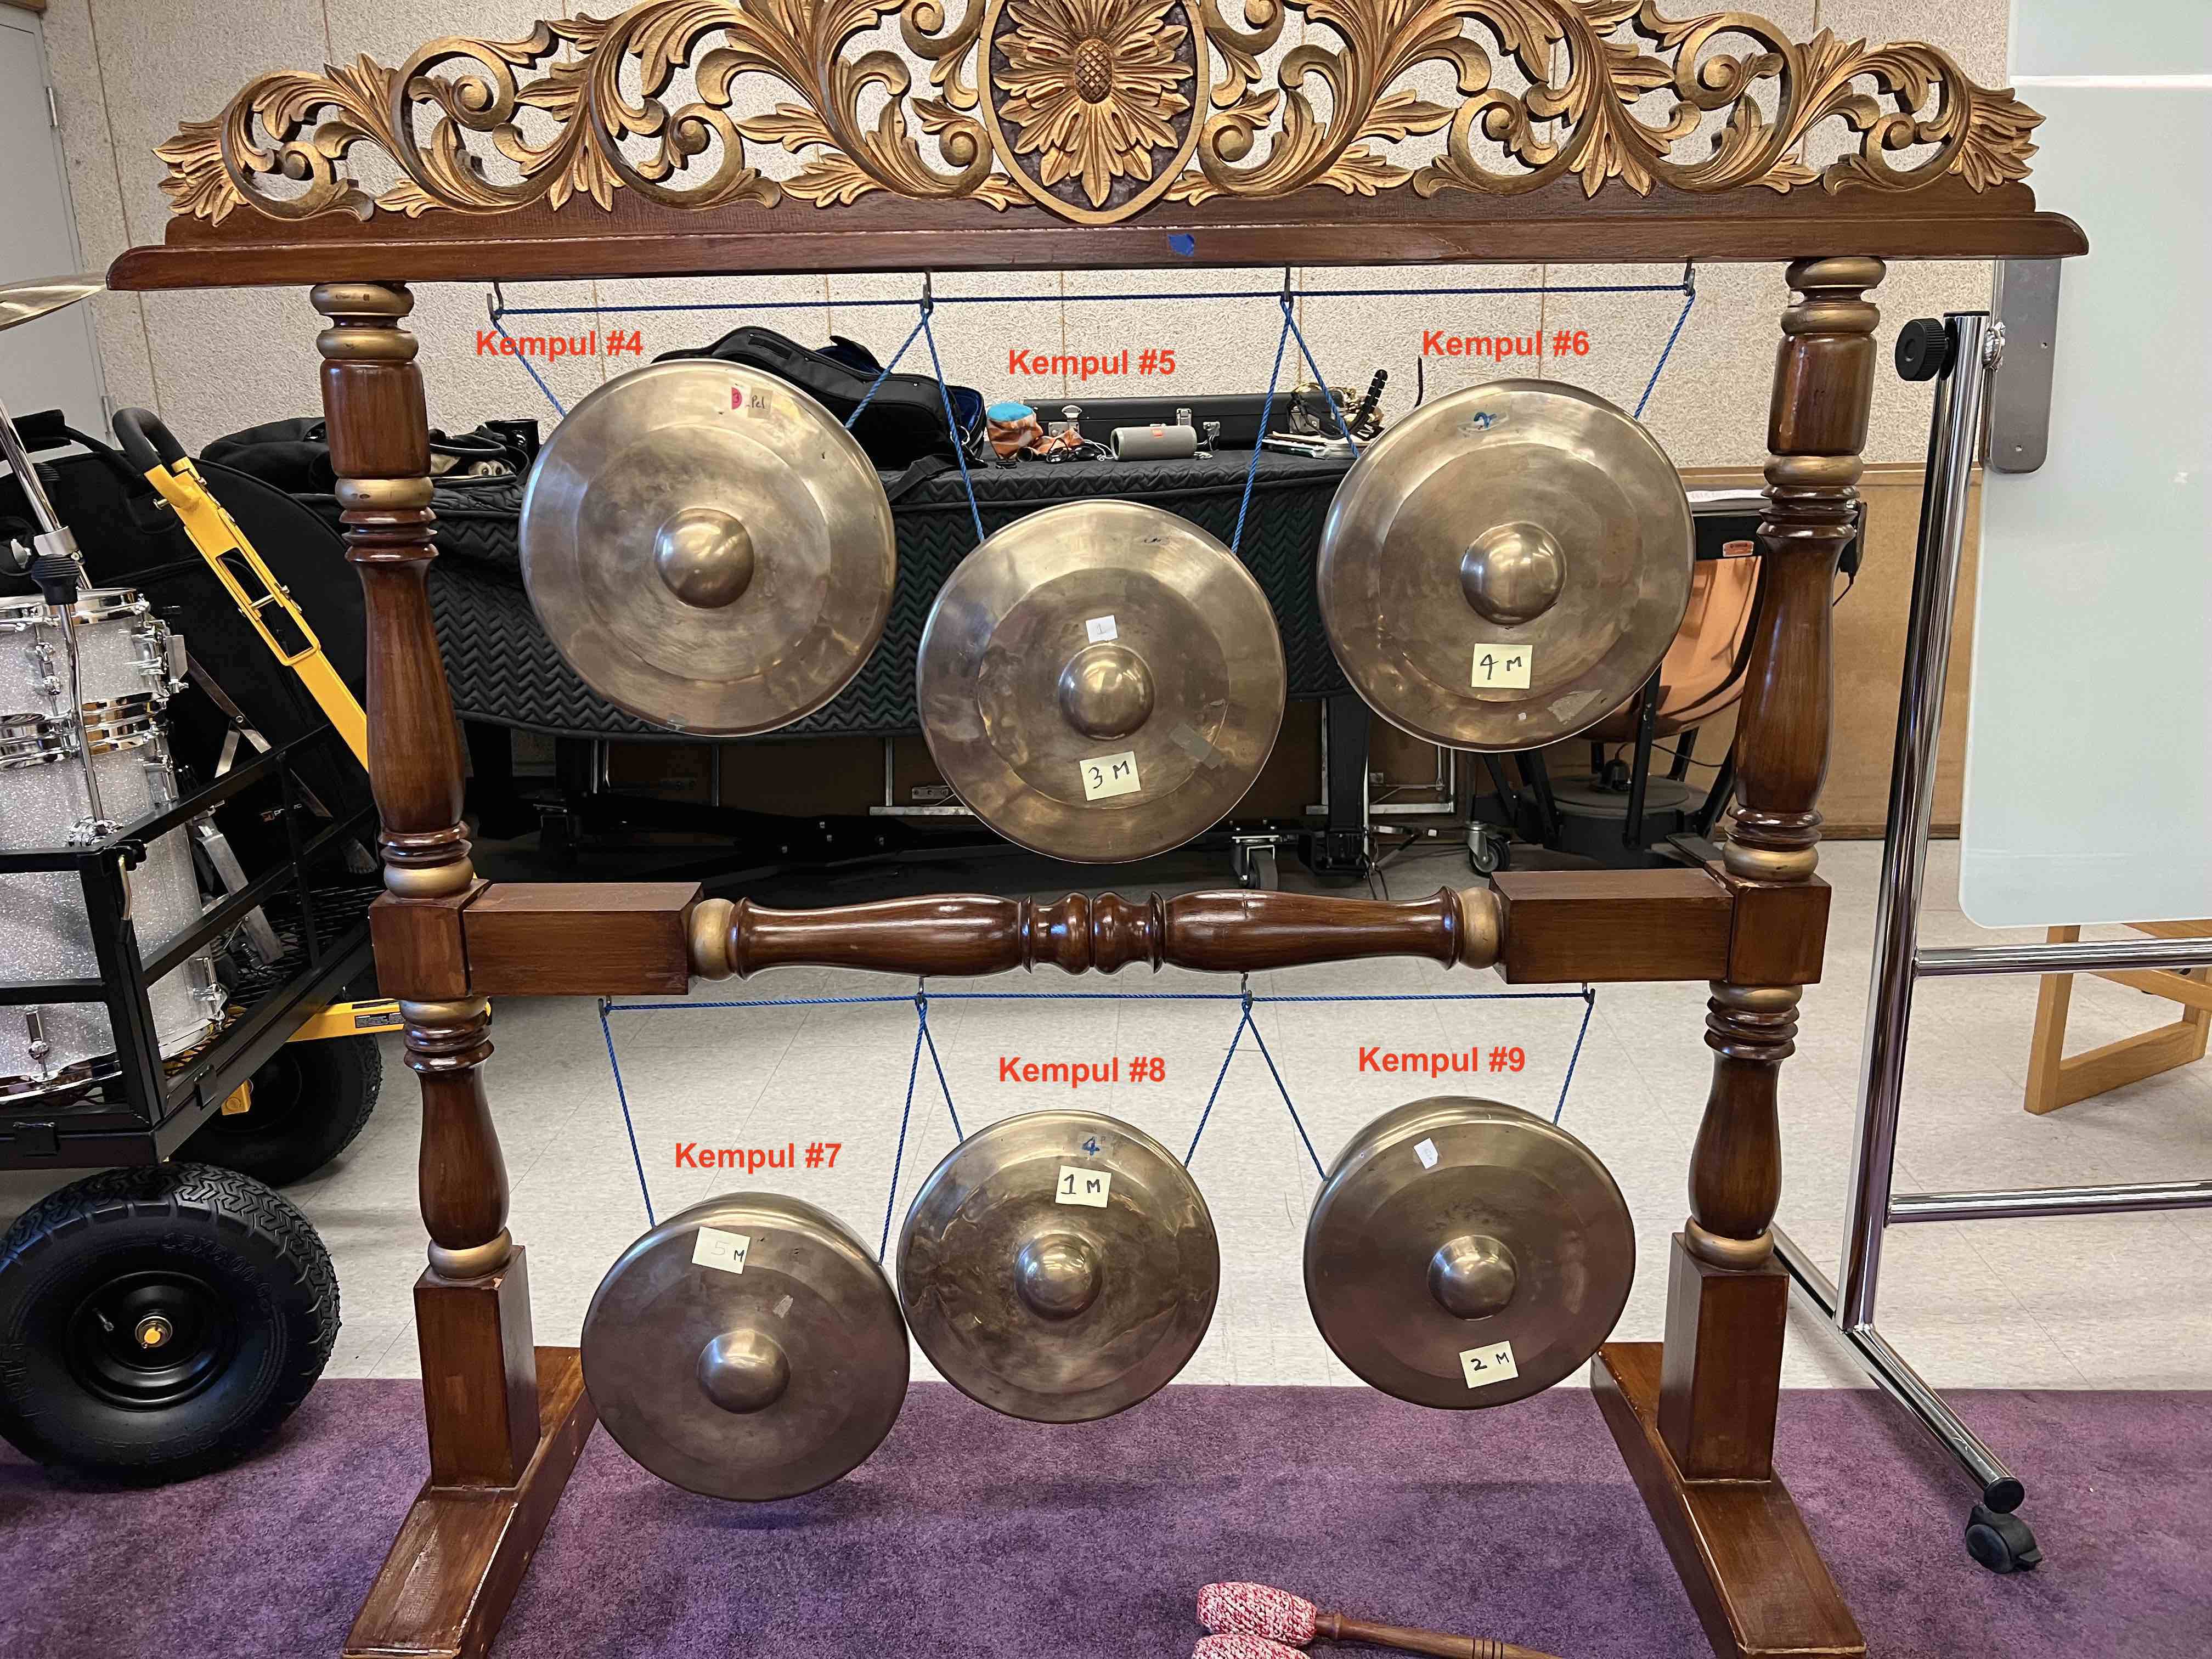
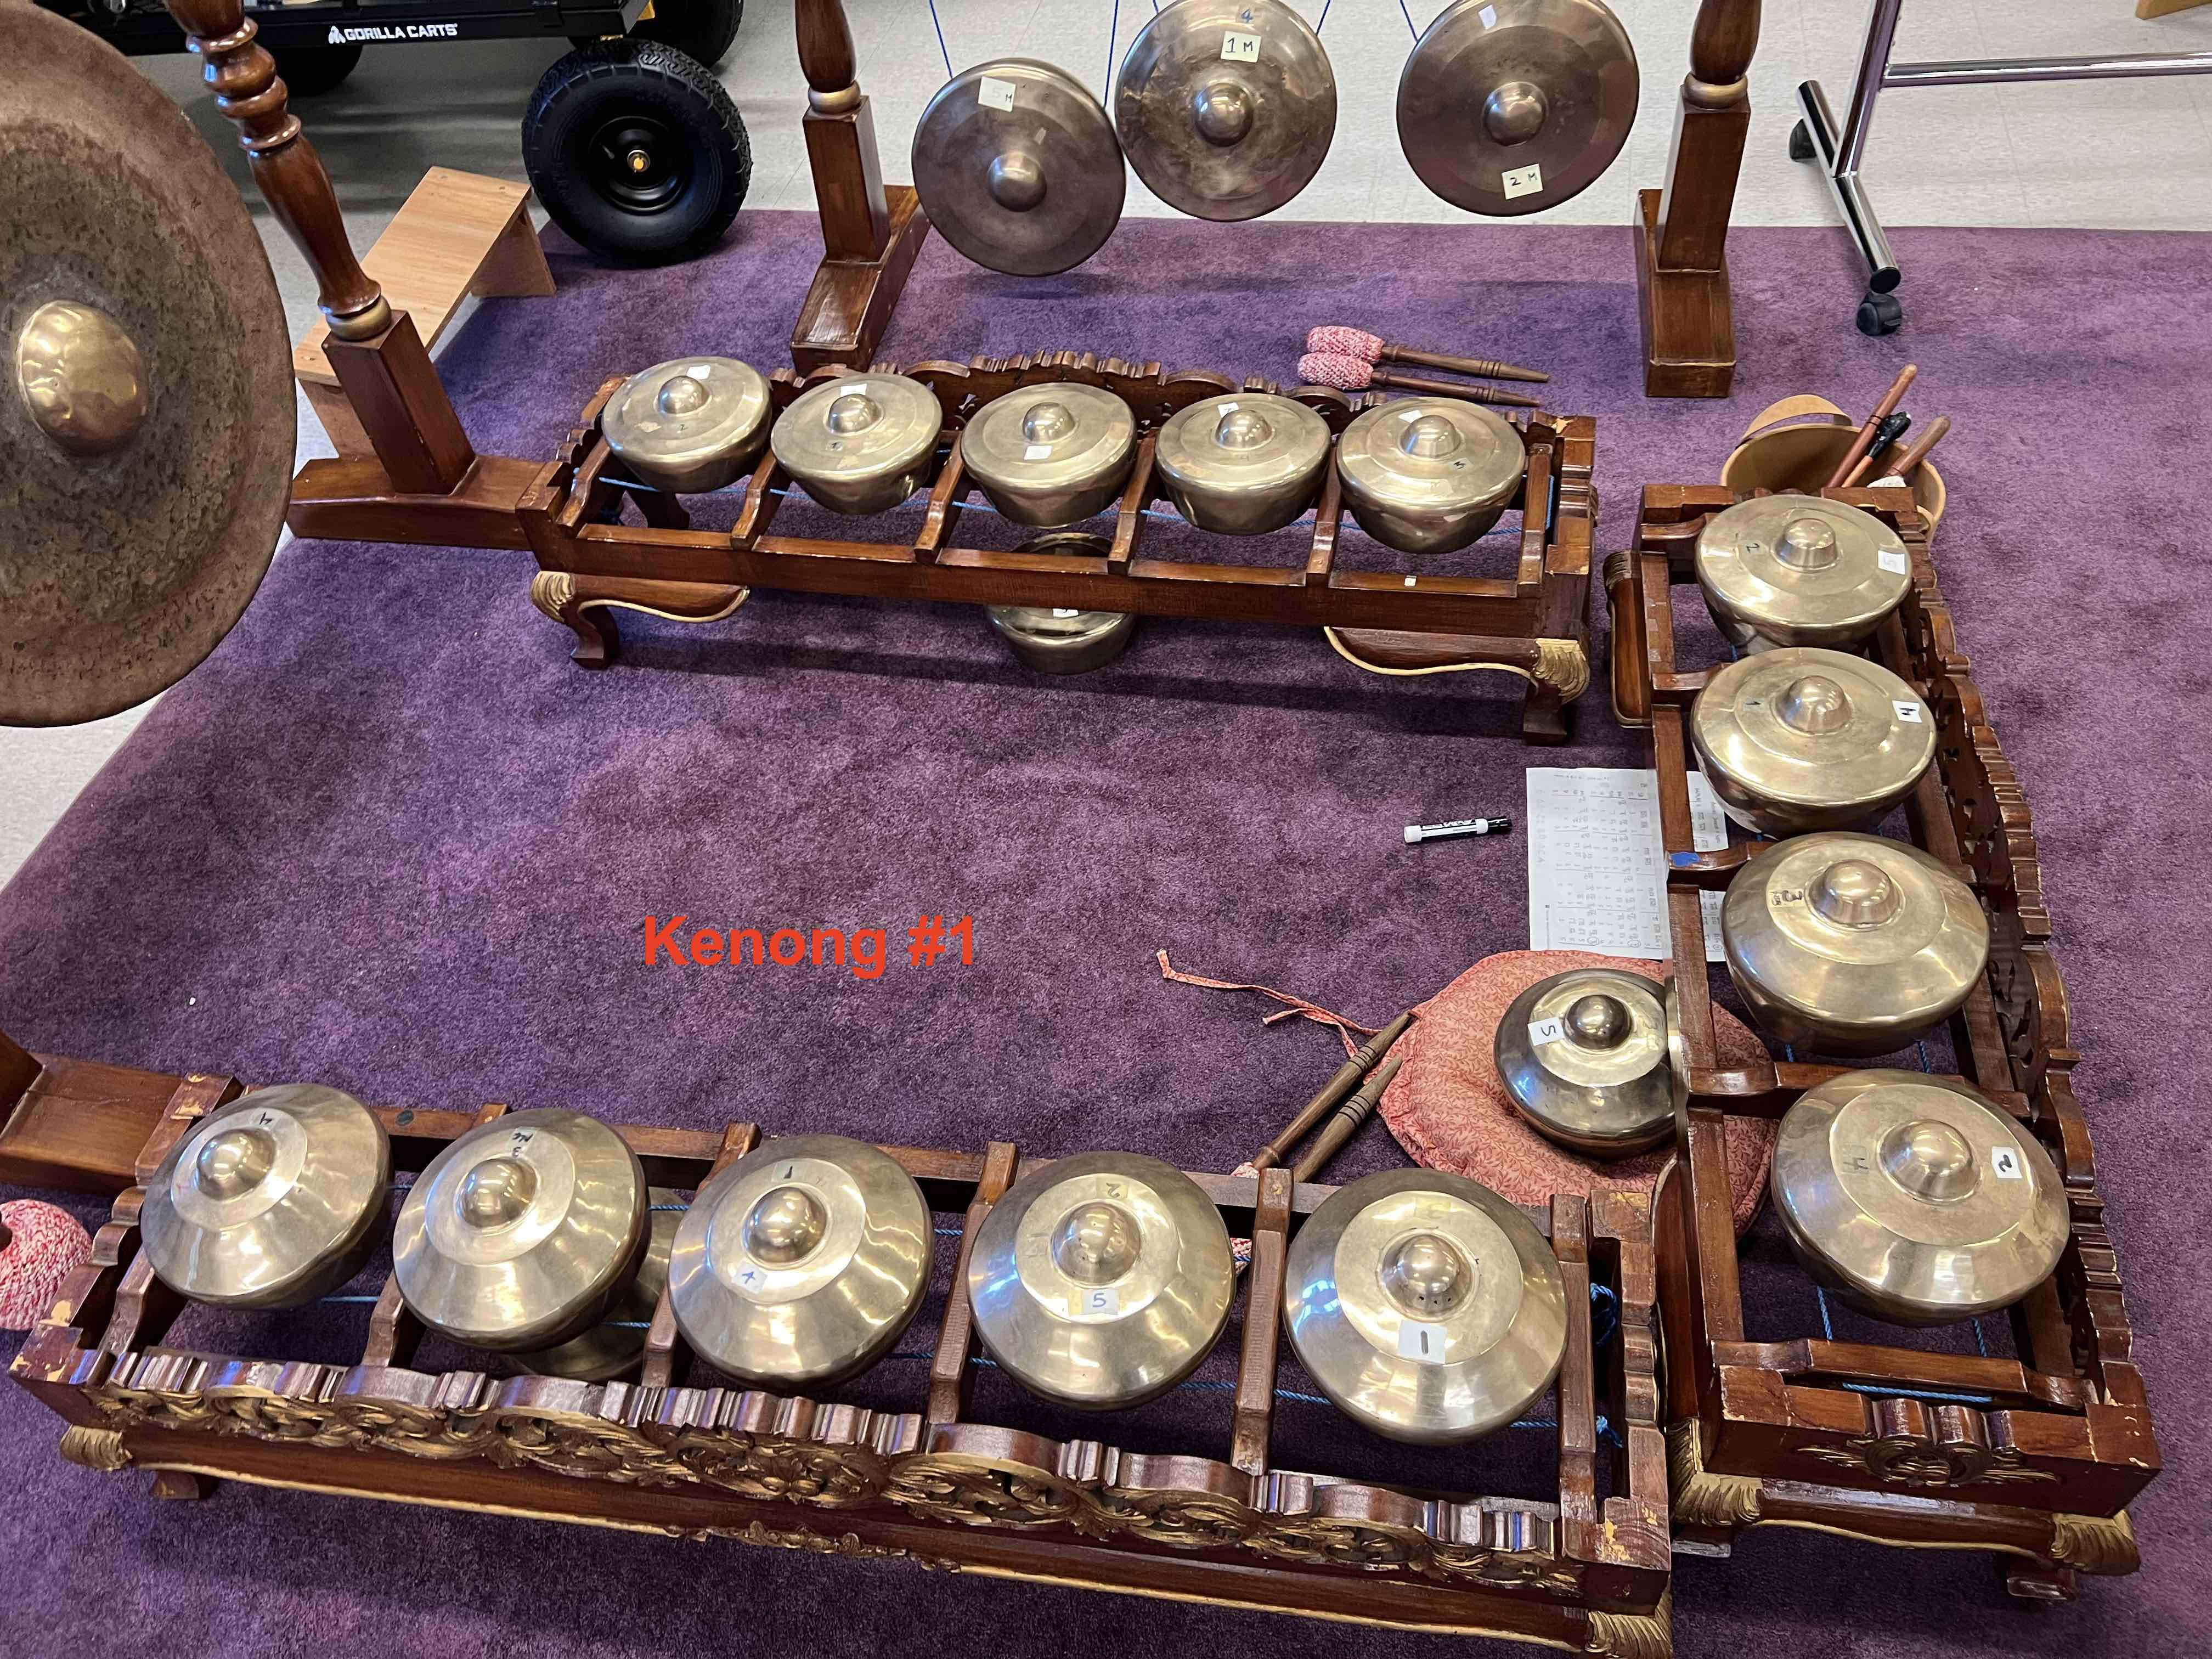
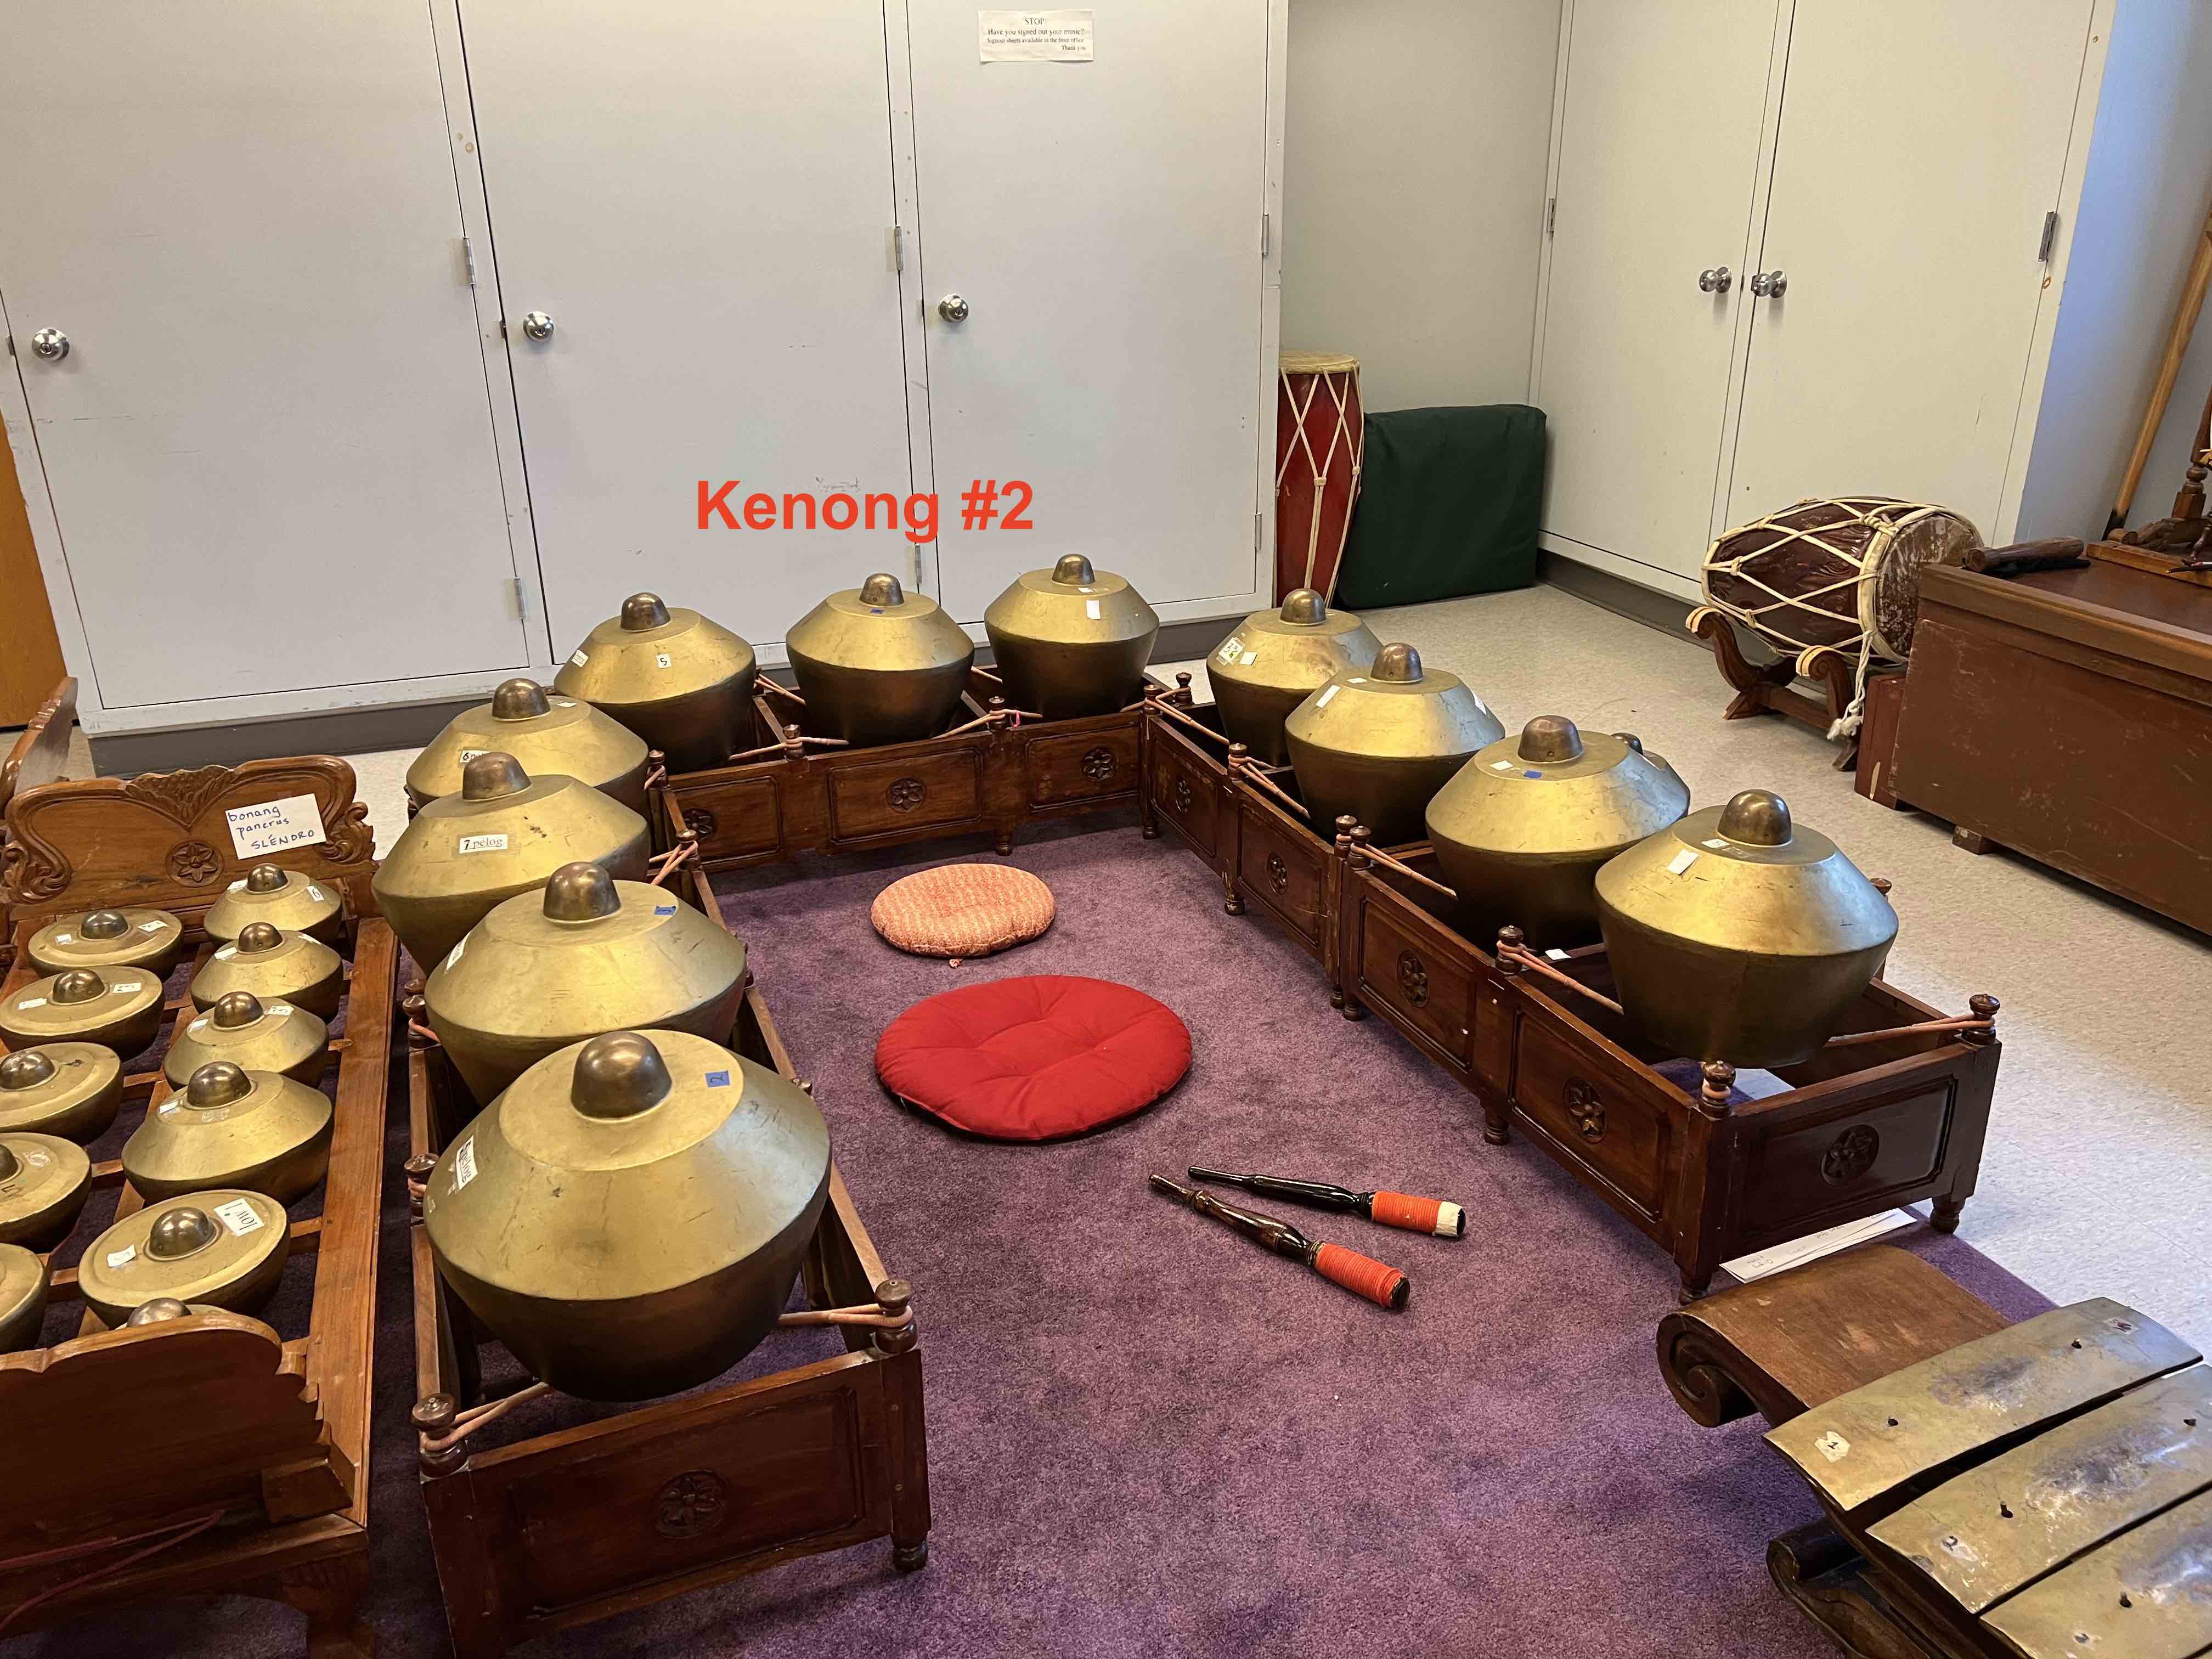
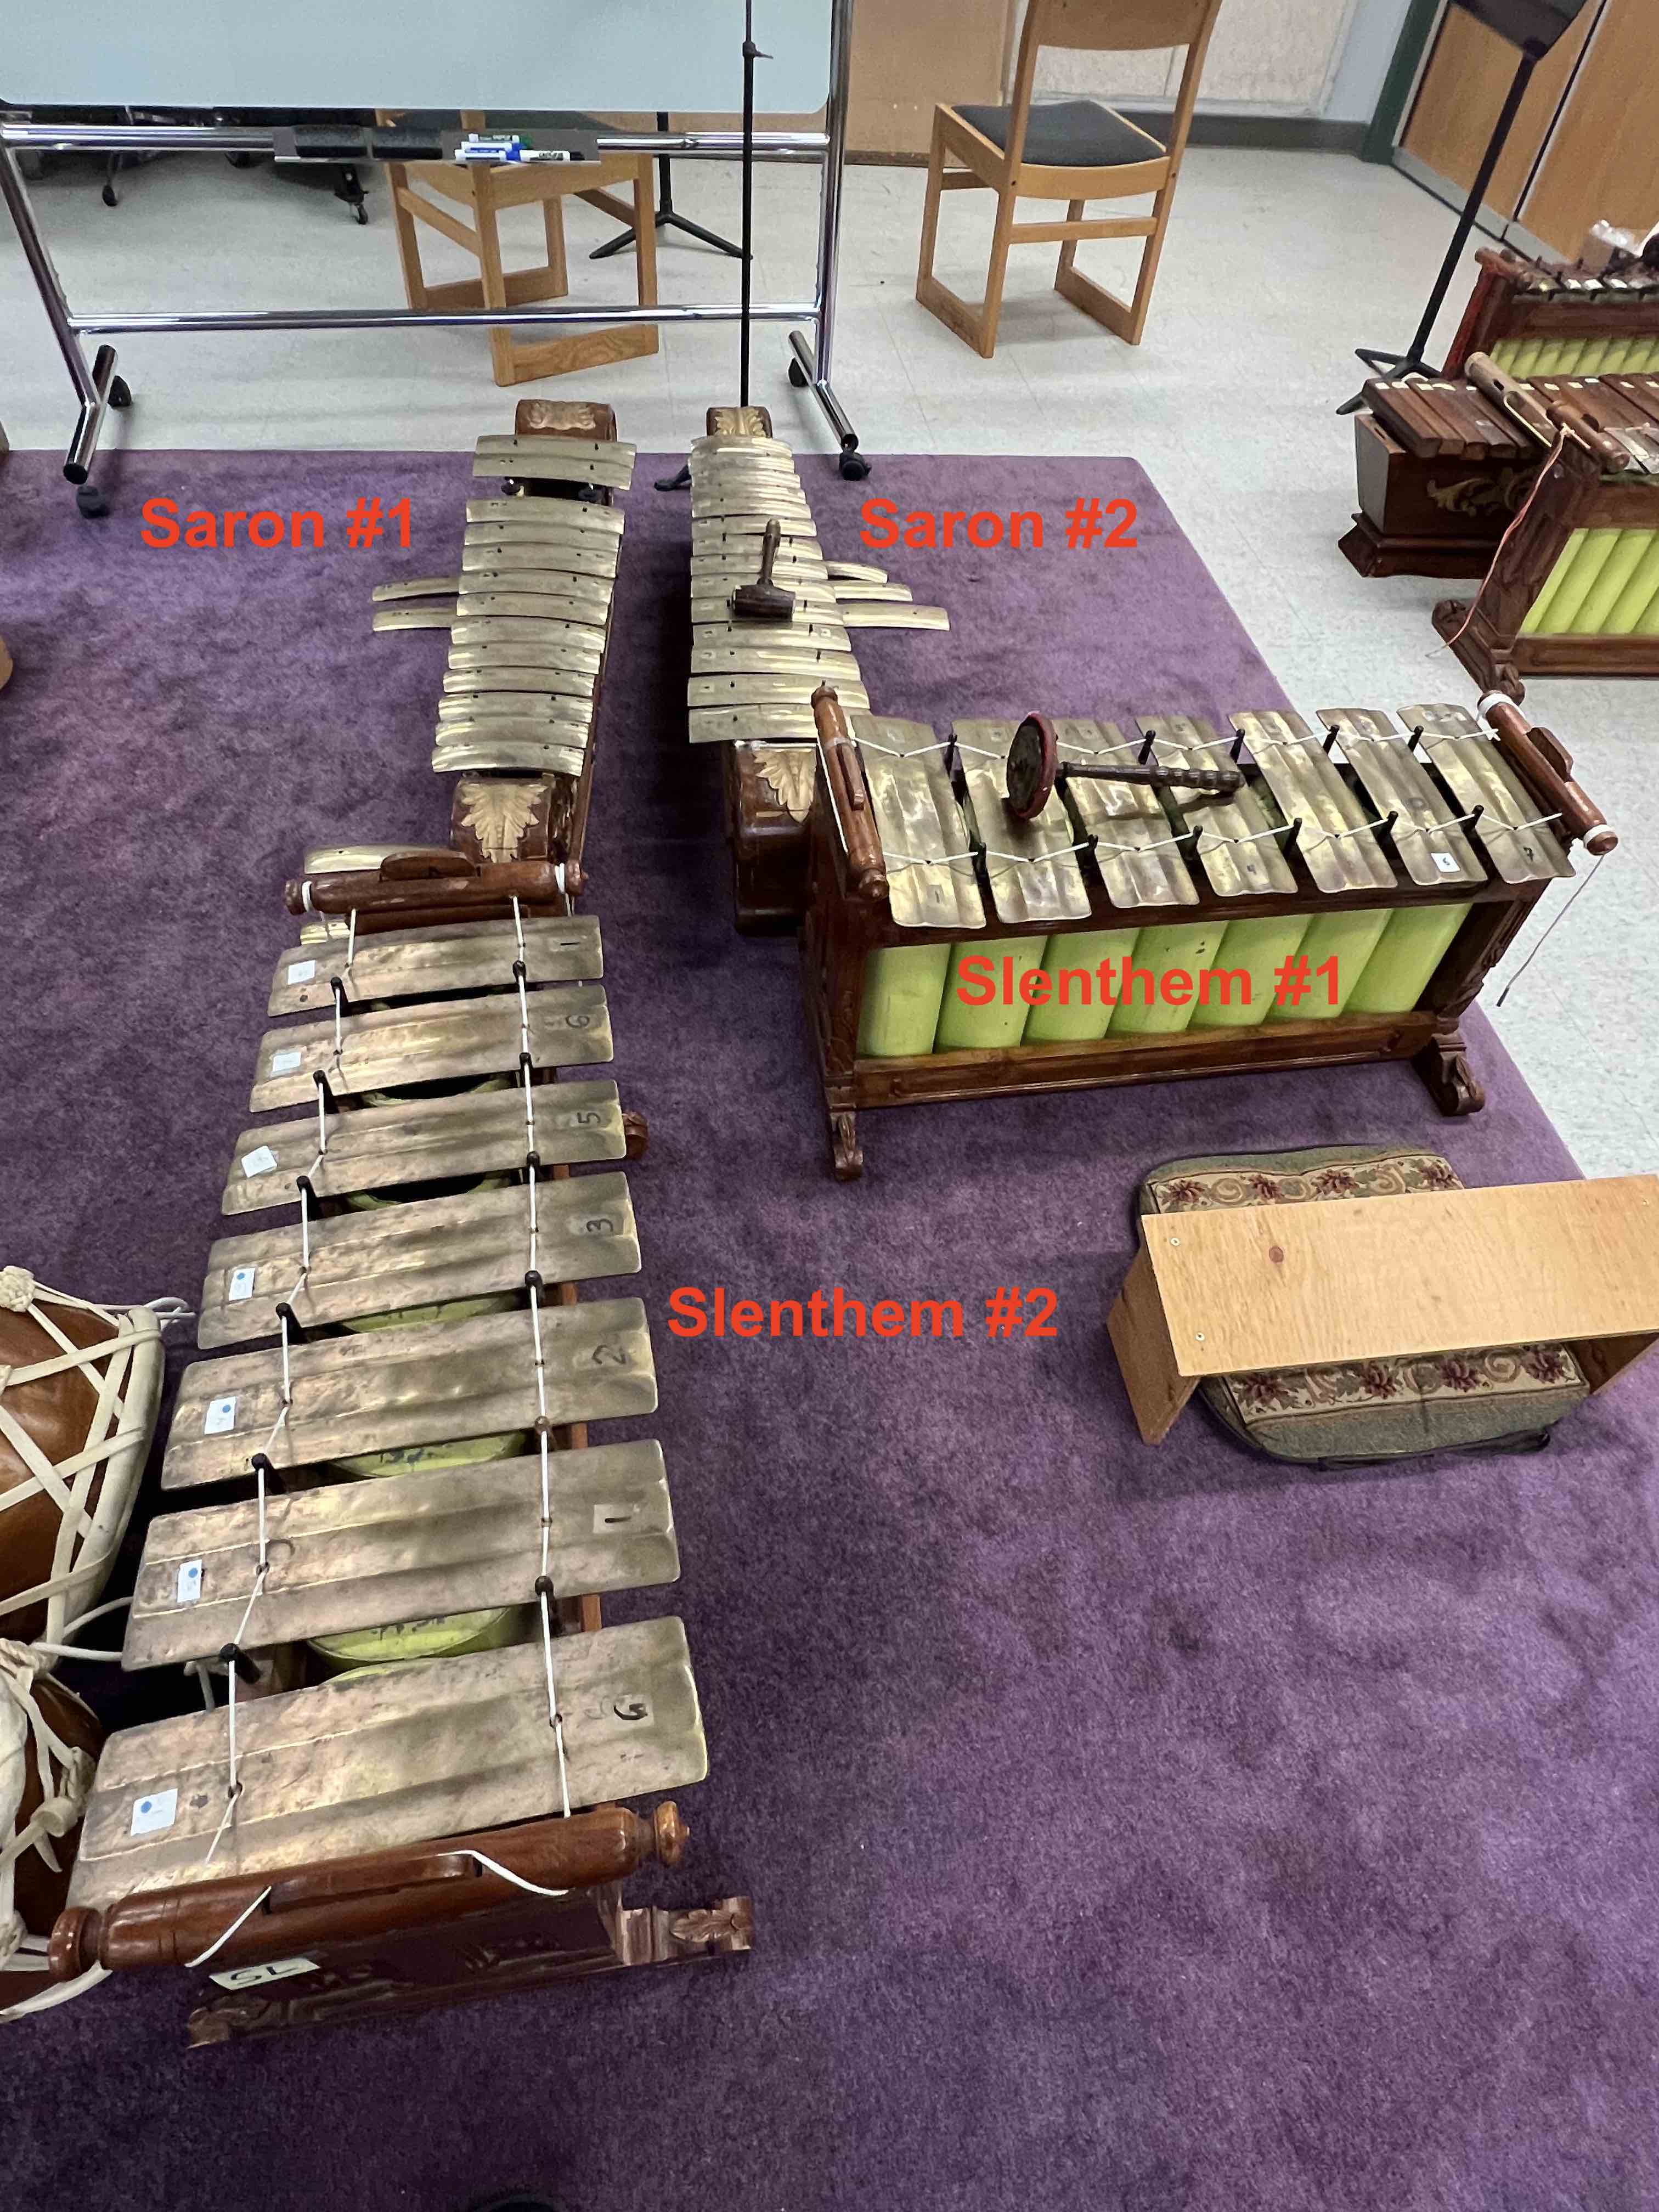
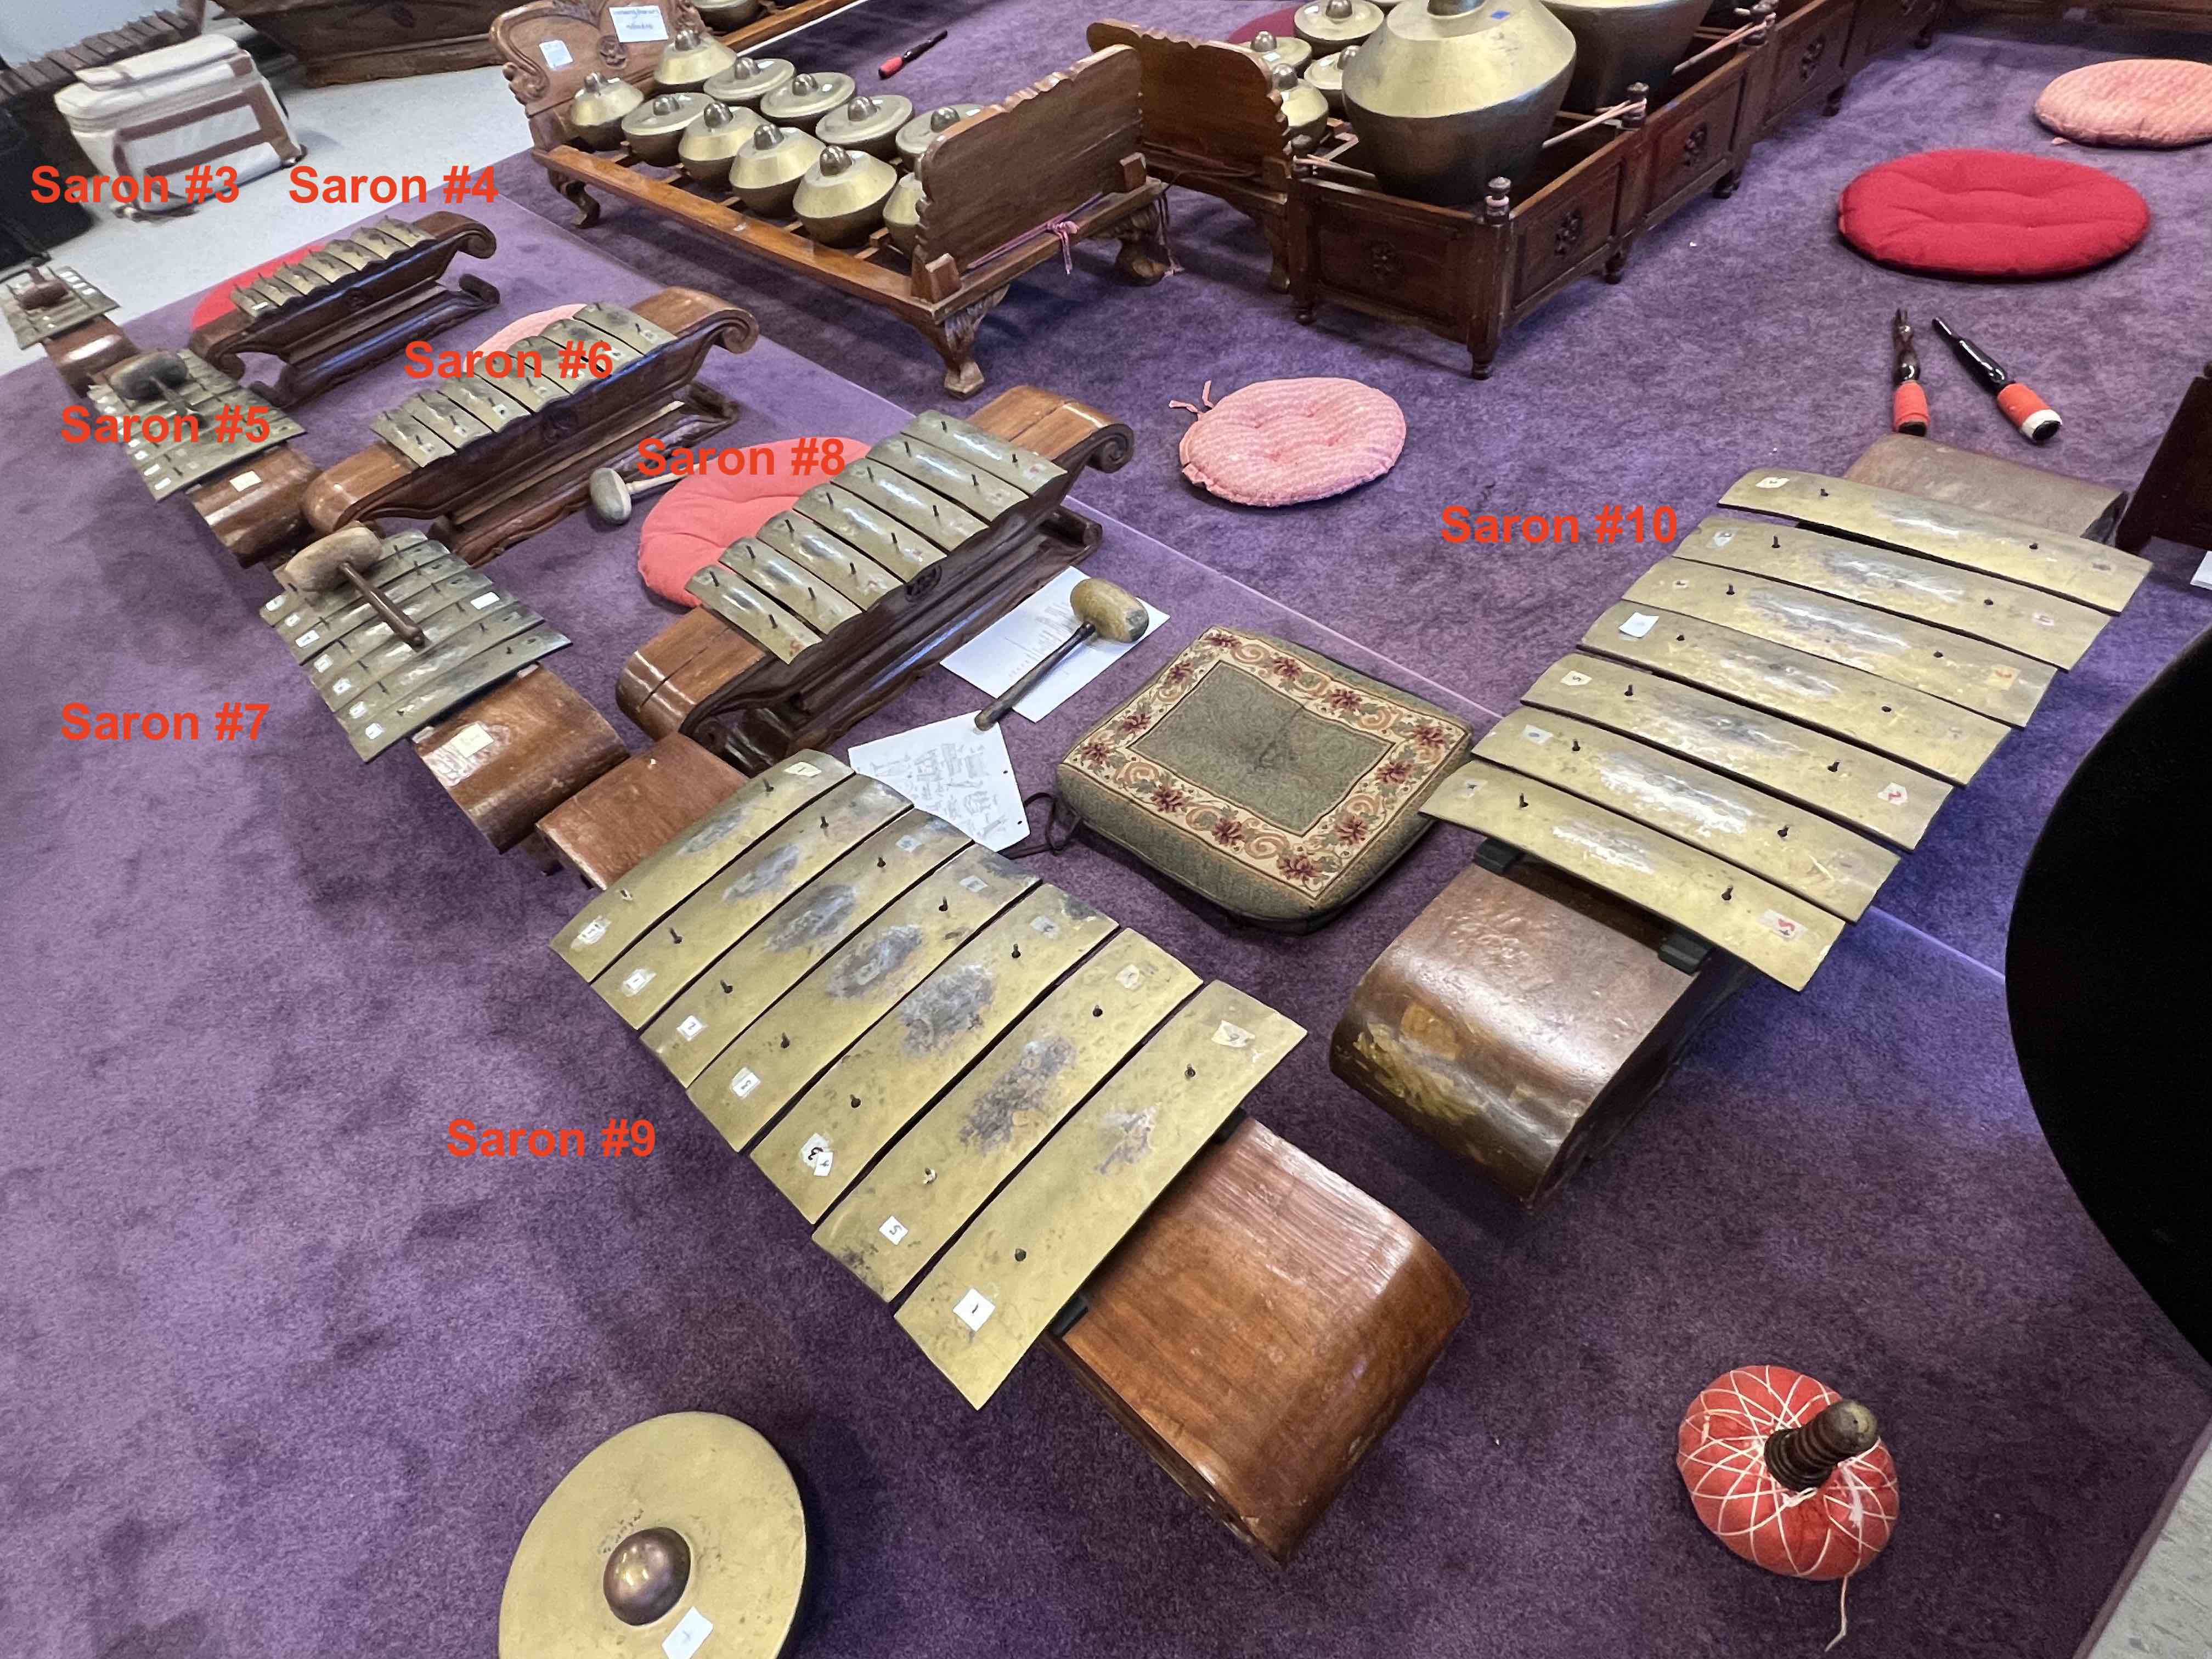
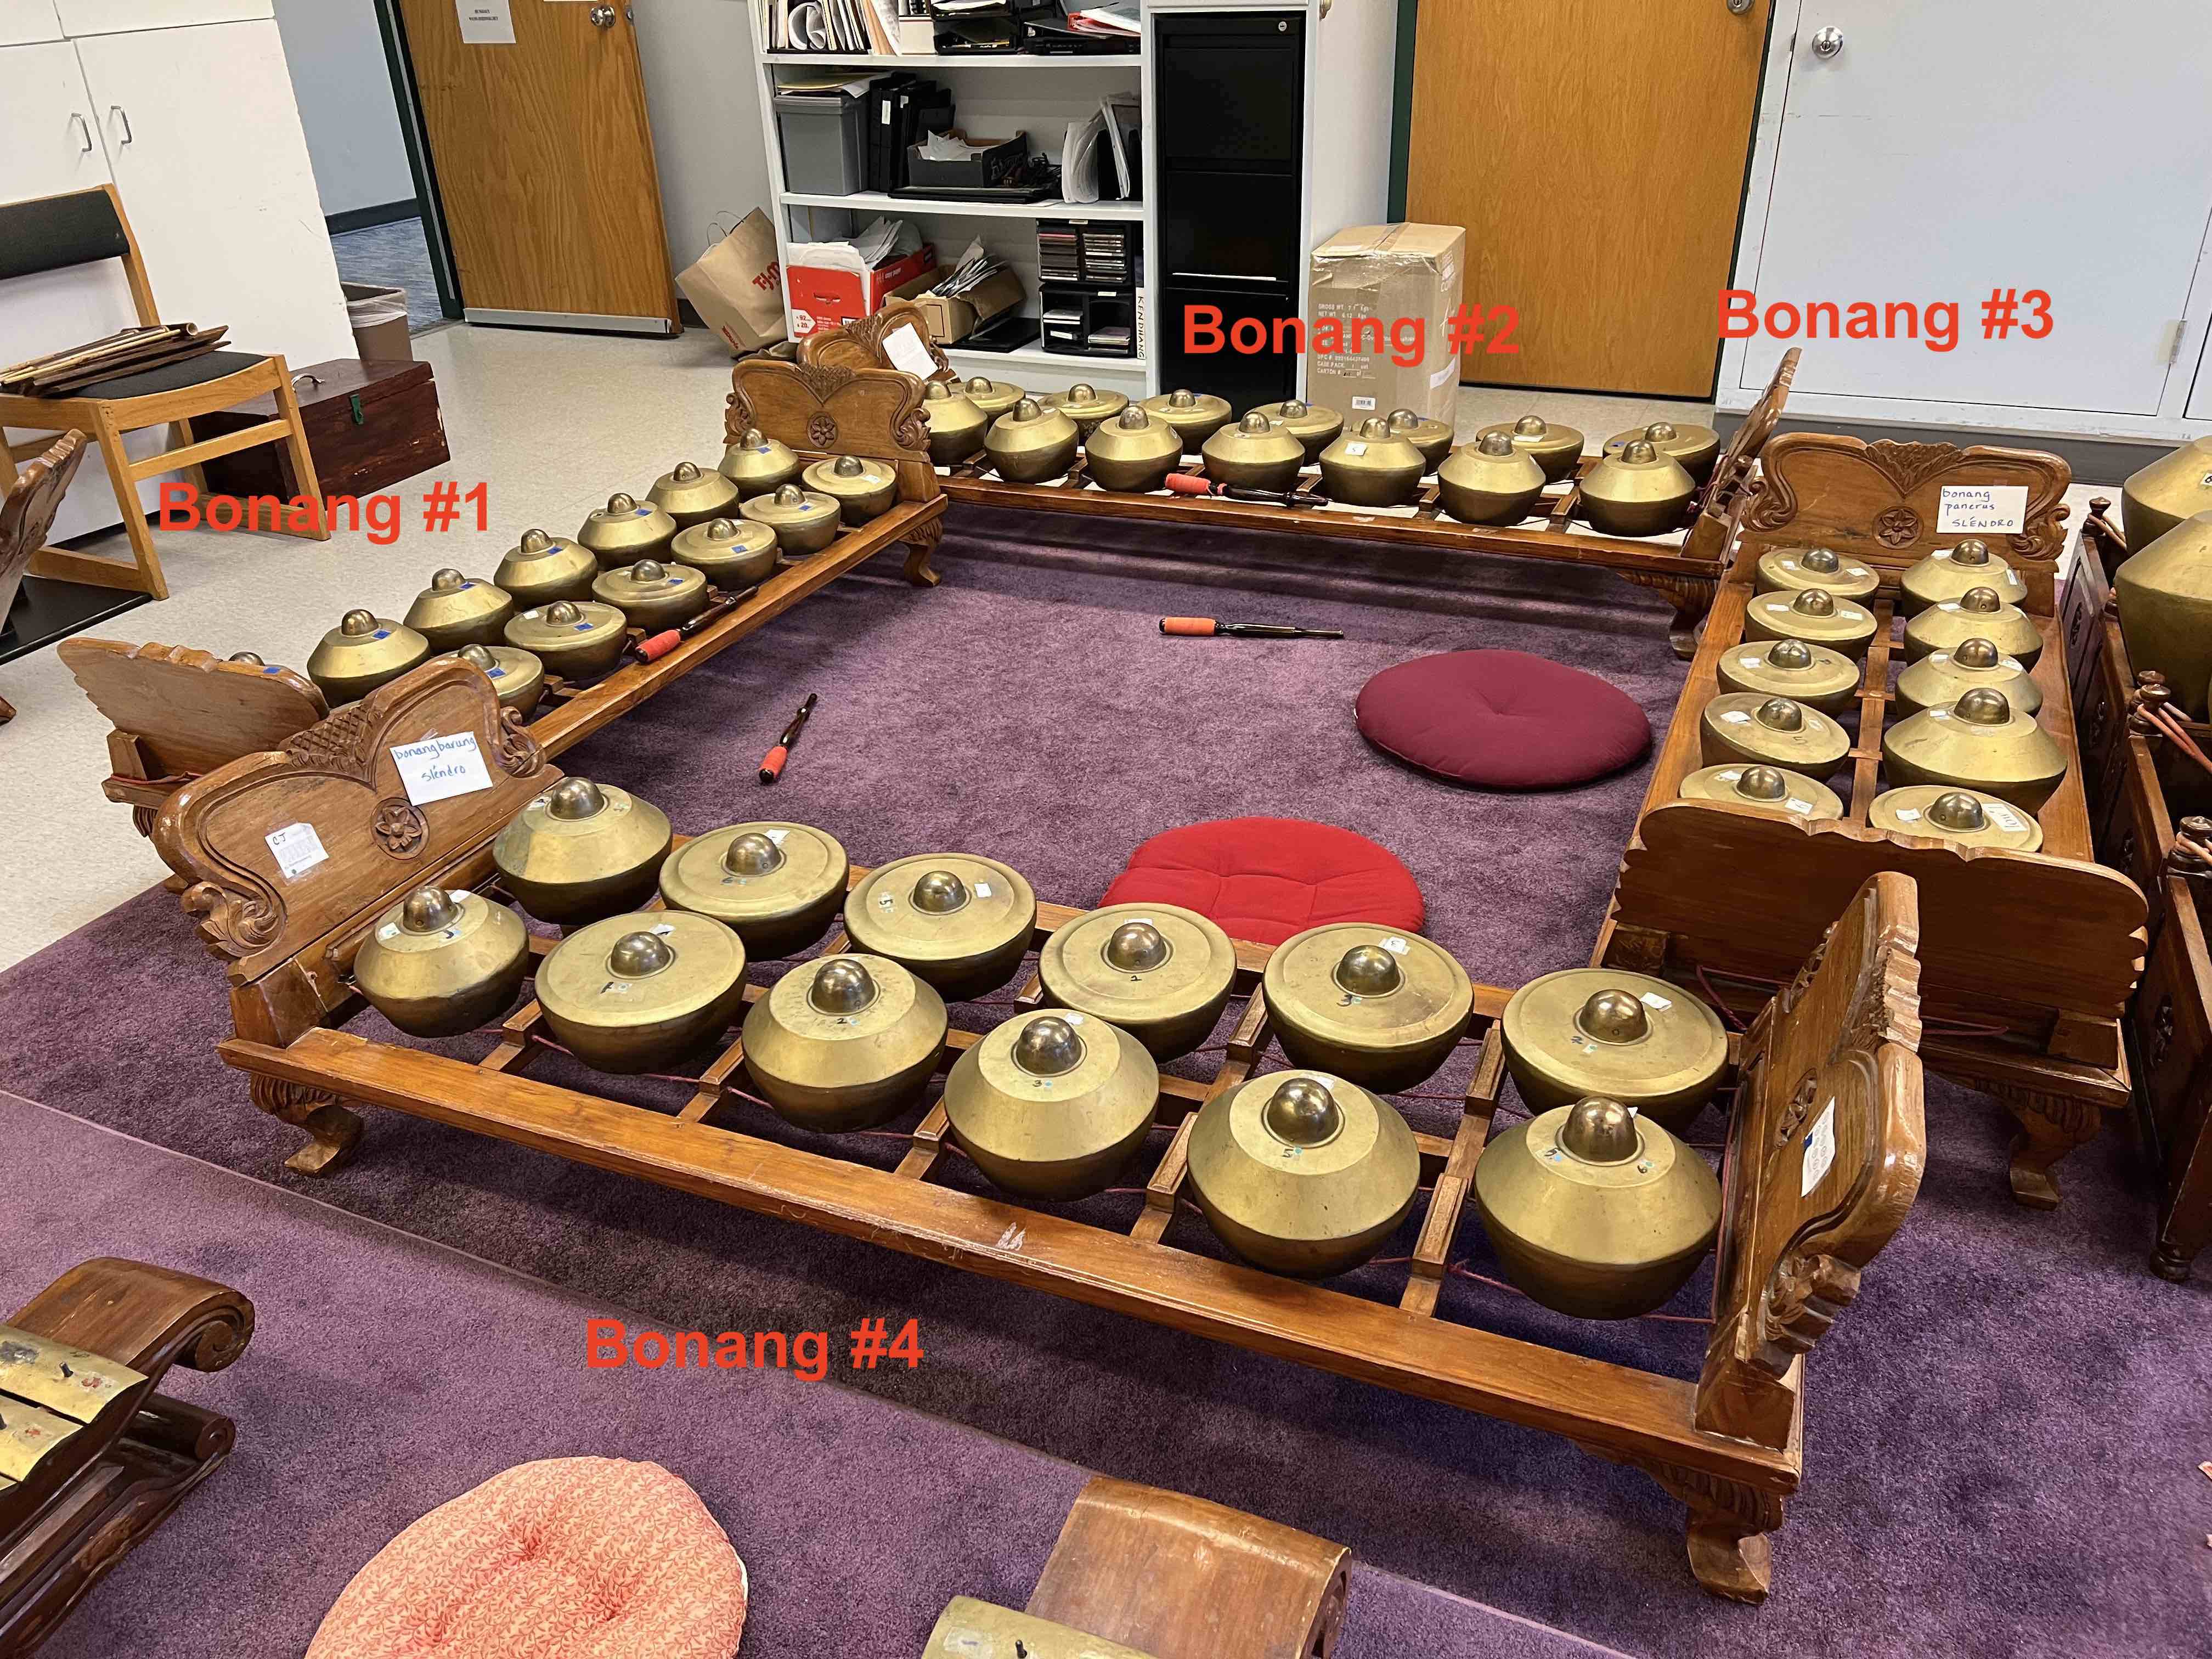
See the photos with labeled instruments below. The teams are as follows, and the instruments are assigned to the following teams. Find the instrument(s) you will be recording in the photos that follow:
Teams
Don’t worry; everybody gets to record one of the gongs! Your Teams and instrument recording assignments are as follows:
TEAM 1: TCSM-5
Mason, Hannah, Xucheng
- Saron #1 and #2
- Slenthem #1
- Bonang #1
- Kempul #4 and #5
- Gender #3 and #4
- Gambang #1
- Gong #1
TEAM 2: TCSM-4
Noah, Drew, Nate
- Saron #3 and #4
- Slenthem #2
- Bonang #2
- Kempul #6 and #7
- Gender #5 and #6
- Gambang #2
- Gong #2
TEAM 3: TCSM-3
Tauson, Scarlett, Elias
- Saron #5 , #6 , and #10
- Bonang #3
- Kenong #1
- Kempul #1 and #2
- Gambang #3
- Gong #1
TEAM 4: TCSM-1
Darius, Kieran, Ronan
- Saron #7 , #8 , and #9
- Bonang #4
- Kenong #2
- Kempul #8 and #9
- Gender #1 and #2
- Gong #2
Instruments
Find your instrument(s) assignments in these photos:
Step 2: Recording Setup
- Use a recording kit checked out from the Bates Sound Studio.
- Set gain to avoid clipping while preserving dynamics. Aim for peaks around –12 to -8 dBFS.
- Place microphones thoughtfully, aiming for the most dry/direct sound you can capture:
- Avoid room bleed, background noise, air duct hum and “room tone,” recorder and microphone handling noise, etc.
Step 3: Required Recordings
For each pitch of each instrument:
- Record multiple dynamic levels (pp, mf, ff).
- Record multiple note lengths (short damped, sustained until resonance fades).
- Record different excitation methods (mallet types, muted vs. open, scrapes or rolls).
- Photograph and index the instruments and mallets or excitors that you use, which will be included with the sample library.
Step 4: Editing
- Import recordings into Reaper.
- Trim so that the file begins exactly at the attack.
- Short fade out after the resonance has fully decayed.
- Do not apply processing to the sound (e.g., no noise reduction, EQ, etc.), preserving the natural sound.
- Export each sample as WAV, 48 kHz / 24-bit.
Step 5: Naming Convention
All files must follow this structure:
instrument-playingMode-note-dynamics-optionalOthers.wav
- instrument = instrument name (e.g.,
saron,bonang,kenong) - playingMode = type of strike / excitation (e.g.,
open,muted,roll,scrape) - note = pitch (e.g.,
E4,A3) - dynamics = dynamic marking (
pp,mf,ff) - optionalOthers = optional extra descriptor (e.g., mallet type, room, initials)
Examples:
saron-open-C4-mf.wavbonang-muted-G3-ff.wavlargeGong1-roll-B2-pp-hardMallet.wav
By adhering strictly to this convention, we can write software that automatically detects and organizes our samples according to the file’s metadata. Ensure the dash character - is only used to separate these metadata fields and appears nowhere else in the file name.
Step 6: Submission
- Create a folder for each instrument your team sampled, and put all samples and photos relating to that instrument inside this folder.
- Place your team’s folders (containing all edited sounds and photos) into a single “master folder” labeled:
TeamName_Instrument. - Submit your team’s “master folder” to the shared class drive by the deadline.
- All teams’ files will be consolidated into a master class sample library.
Step 7: (Optional) Try Sampler
Load any of your samples into the Reaper sampler to test their usability. Experiment with transfomring the sounds using sampler paramters.
Evaluation Criteria
- Completeness (25%) — All assigned instruments and pitches sampled; includes required variations.
- Recording Quality (25%) — Clean audio, correct levels, no clipping or excessive noise.
- Editing Accuracy (20%) — Attacks precisely trimmed; resonance captured; files properly faded.
- Naming & Organization (20%) — Files follow the required convention exactly.
- Collaboration (10%) — Team contributed fully to the collective library.