Lab 3 — Creating Local and Remote Repositories
In this lab, you’ll be:
- creating two repositories, one local and one remote
- linking the two with each other so that they can be synchronized
- associating a name and email address with your local repository
- creating a README.md file to describe your lab
- sending those changes to your remote repository on github
your git cheatsheet: A Summary of Commands
THESE ARE NOT LAB INSTRUCTIONS.
The following is just a reference. The lab instructions are below.
# create a local repository
git init

# configure it with your name and email
git config user.name  "your name"
git config user.email "your@email.address"

# create a remote repository
curl -u 'your GitHub user name' https://api.github.com/user/repos -d '{"name":"your repository name"}'

# link the two
git remote add origin url_to_your_repository_on_github

# two ways to show all remote repositories
git remote -v
cat .git/config

# removing a remote repository by name (usually origin)
git remote remove name_of_remote

# changing / setting the url of a named remote repository (usually origin)
git remote set-url name_of_remote new_remote_url

# look at the differences between your last save and your current changes (line by line)
git diff --color

# check on the status of your changes
git status

# "stage" or mark your changes as ready to be saved
git add --all

# save!
git commit -m 'my message'

# show a log of your changes so far
git log --color (show your changes so far)

# send to a remote repository (to submit an assignment)
git push origin master
Instructions
Set up Your Local Repository
This will create a local git repository to store your work for this lab. You can set this up anywhere on your computer, but to keep things organized, we recommend that you create the repository here:
/Users/[yourUserName]/Desktop/myClasses/mtec1003/lab-03-git-intro
- Open Terminal.
- If doesn’t already exist create a folder called mtec1003. It should live in a place like ~/Desktop or ~/Desktop/myClasses so you can easily find it. Change into that directory:
cd ~/Desktop/myClasses
mkdir mtec1003
- Or if this directory already exists, just change into it:
cd ~/Desktop/myClasses/mtec1003- within that folder, create another folder called lab-03-git-intro and change into it
mkdir lab-03-git-intro
cd lab-03-git-intro- Use pwd to verify that you’re in the correct folder
- You should be in ~/Desktop/myClasses/mtec1003/lab-03-git-intro
- If you’re not, change into it.
- To prove that this is not yet a repository, list all files in your current directory:
ls -al
- It should mostly be empty.
total 0
drwxr-xr-x  2 bree  staff   68 Feb 26 07:52 .
drwxr-xr-x  3 bree  staff  102 Feb 26 07:52 ..
- Now, in your /lab-03-git-intro folder, create your repository!
git init
- it should say:
Initialized empty Git repository in /Users/[yourUserName]/Desktop/myClasses/mtec1003/lab-03-git-intro.git
- show that this worked by listing all files in your current directory
ls -al
- check that this shows .git
- use ls .git to show the contents of your repository (it should contain a configuration file, for example)
ls .git
- configure your name and email for your commits (these do not have to be the same as your GitHub account)
# in the directory of your repository
git config user.name  "my first and last name"
git config user.email "my@email.address"
- finally, use git config again to see if this worked:
git config -l
- (use should see your name and email appear in the configuration)
Create Your Remote Repository
This will create a remote git repository on github. It will also link your local repository with this remote repository. In order to submit your work, you will send your files / changes from your local repository to the remote repository on github.
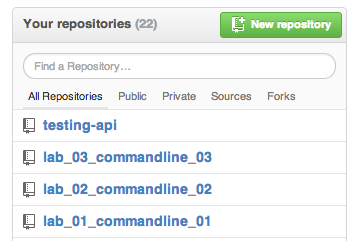
- Log in to GitHub; you should see the list of repositories on the right.

- You should have all of the previous lab related repositories.
- Before resuming work on this tutorial below, complete the next steps outlined in this tutorial that teaches you how to link your local and remote repositories using a GitHub API access token.
- Go back to Terminal.
- make sure you’re in your local repository folder for lab-03-git-intro
- use pwd to do this
- you should be in ~/Desktop/myClasses/mtec1003/lab-03-git-intro
- if you’re not in your lab folder, change your directory to it
- run this command to show that you have not linked your local repository to any remote repository yet
git remote -v
- it should do nothing
- now, link your local repository to your remote repository on GitHub by using git remote add
- make sure to substitute where it says “ yourGitHubUserName ” with your actual GitHub username
git remote add origin https://github.com/yourGitHubUserName/lab-03-git-intro.git
- (alternatively, if you click on your repo you can see your remote repository’s url on the lower right hand side of the page…)

- to check that you’ve linked properly, run the following command again:
git remote -v
- it should show origin … and your repository url:
origin	https://github.com/[yourGitHubUserName]/lab-03-git-intro.git (fetch)
origin	https://github.com/[yourGitHubUserName]/lab-03-git-intro.git (push)
Creating and Saving Changes Locally, Sending to Remote Repository
In this part of the lab, you will create a text file in your local repository, and then you’ll send it to your remote repository.
- open terminal
- make sure you’re in your local repository folder for lab-03-git-intro
- use pwd to do this
- you should be in ~/Desktop/myClasses/mtec1003/lab-03-git-intro
- if you’re not in your lab folder, change your directory to it
- if this doesn’t exist yet… make sure you completed the beginning part of this lab
- use git status to show that there aren’t any changes yet
git status
- it should give the following output
# On branch master
#
# Initial commit
#
nothing to commit (create/copy files and use "git add" to track)
- create a file called README.markdown using your text editor (e.g. Atom, Sublime Text, etc.) (see below…)
- go to Applications → Atom (or use Command+Spacebar to activate spotlight search, then start typing Atom)
- once Atom is open, go to File → New (or Command+n) to create a new file
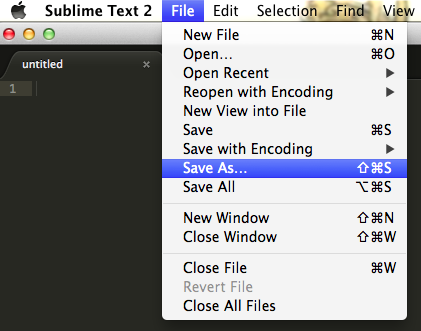
- save your file by going to File → Save As to save your files as README.markdown in your ~/Desktop/myClasses/mtec1003/lab-03-git-intro

- make sure you navigate to your ~/Desktop/myClasses/mtec1003/lab-03-git-intro before saving!

- switch back to terminal
- use git status to show that you’ve made changes
git status
- it should give the following output; notice that it contains README.markdown
# On branch master
#
# Initial commit
#
# Untracked files:
#   (use "git add <file>..." to include in what will be committed)
#
#	README.markdown
nothing added to commit but untracked files present (use "git add" to track)
- if we want to save this file in the repository, we have stage it (that is, mark it as something that we’re ready to save / commit)
git add --all
- to check that you’ve staged your commit, use git status again
git status
- it should output the following text (note that README.markdown moved from untracked to Changes to be committed)
# On branch master
#
# Initial commit
#
# Changes to be committed:
#   (use "git rm --cached <file>..." to unstage)
#
#	new file:   README.markdown
#
- now we’re ready to commit (that is, save the file to the local repository); everything after the -m is the message that will be associated with the changes that you’ve made
git commit -m "added a README file"
- the output of the command should be:
[master (root-commit) 5b24d27] added readme
 1 file changed, 0 insertions(+), 0 deletions(-)
 create mode 100644 README.markdown
- check the status again
git status
- notice that there is nothing staged and no more changes!
# On branch master
nothing to commit, working directory clean
- to show the changes that you’ve saved so far, use git log
git log --color
- it should show you the following…
commit 5b24d2777a602908978916ca8fe9c8dd2ed6036b
Author: bree <[you]@citytech.cuny.edu>
Date:   Wed Mar 5 11:45:21 2014 -0500

    added readme
- you can share your changes / send them to a remote repository by using git push
git push origin master
- it should result in:
Counting objects: 3, done.
Writing objects: 100% (3/3), 242 bytes | 0 bytes/s, done.
Total 3 (delta 0), reused 0 (delta 0)
To https://github.com/[yourGitHubUserName]/lab-03-git-intro.git
 * [new branch]      master -> master
- go back to GitHub and look in your repository. you should see that file appear.
- go back to Atom
- add two lines to your README.markdown file
This is lab 03...
It's about creating local and remote repositories, and saving new data to these repositories.
- save your file: File → Save or Command+s
- go back to terminal
- use git diff to show your changes
git diff --color
- use git status, add and then commit to save your changes
- use git push to send them to your remote repository
- if you click through the filename on github, you’ll see your changes
- when you’re done try the following:
- show your remote url…
- add it to your README file and save it!
- commit your change…
- set your remote url to some url that does not exist (change the lab number to 7, for example)
- push the change to your remote
- note the error!
- set your url appropriately
- attempt to push your change again