How to Submit Your Second Round of Labs (Week 2)
So, you’ve learned how to “fork” a file on GitHub to create your own copy of it, make some changes, and save (i.e. “commit”) those changes.
This time, we’ll be doing now something slightly more involved: we’ll be copying some files down from GitHub, working on them on our local machine, and then storing all of our work this week on GitHub using something they call “repositories”. We’ll talk about what that means later, but for now, follow this step-by-step guide below for uploading your Week 2 labs…
- From our Schedule Page, navigate to Week 2, and look under Lab Assignments. There are 2 labs. (There used to be 3 but now only 2; you might notice lab 2 / part 1 is missing! Don’t worry — we’re only doing labs 2 and 3 this week.)
- Click on each of them, then right-click and “Save As…” each text file somewhere on your computer.
- Follow the instructions in each lab. As instructed, put each of these lab files inside the same folder.
- When your lab work is complete, you’ll have all of your files collected in a single folder called “mtec1003-lab-02”.
- To upload everything, first log in to GitHub with your username and password.
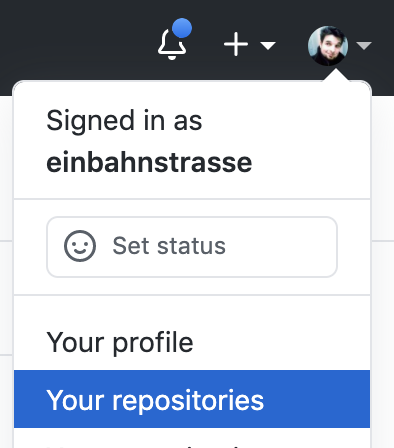
- In the upper-right corner, click on your avatar and select “Your Repositories”:

- On the next page you’ll find a list of “repositories”. Find the green “New” button, and click on it:

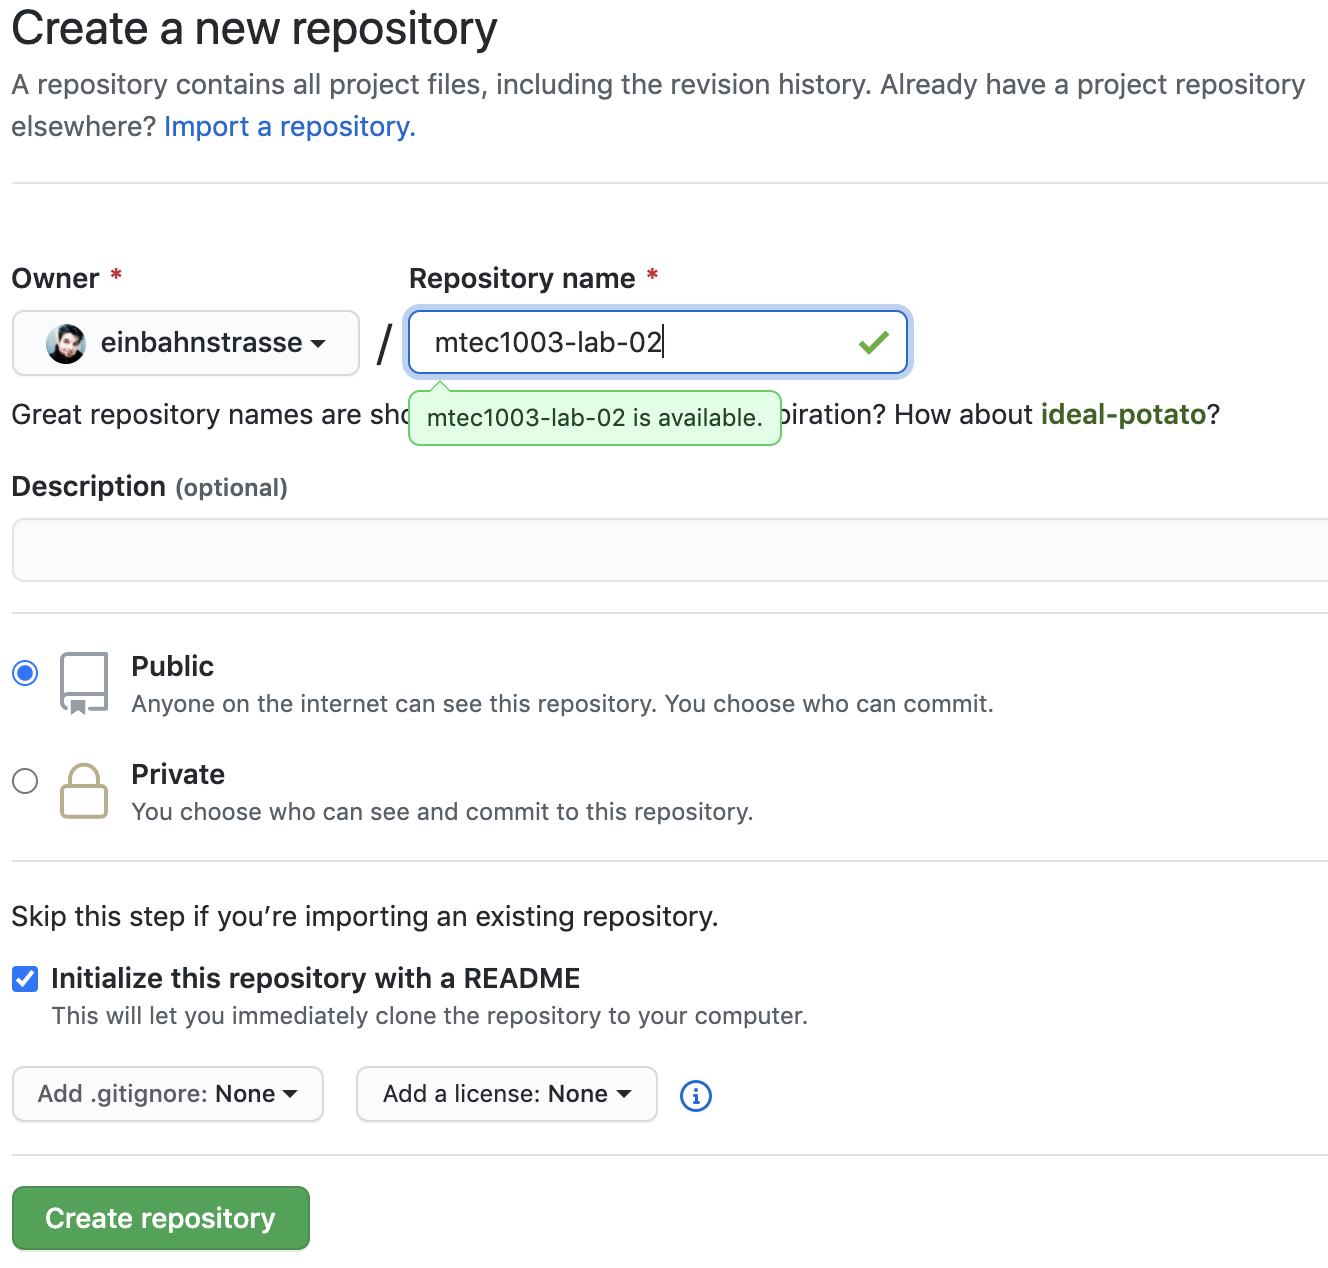
- On the following page, enter a name for your repository, naming it “mtec1003-lab-02” as shown below. Make sure “public” is selected, and then click the checkbox next to “Initialize this repository with a README”. Finally, click the green button called “Create repository” at the bottom.

- Next, find the “Add Files” button, click on it, and select “Upload Files”:

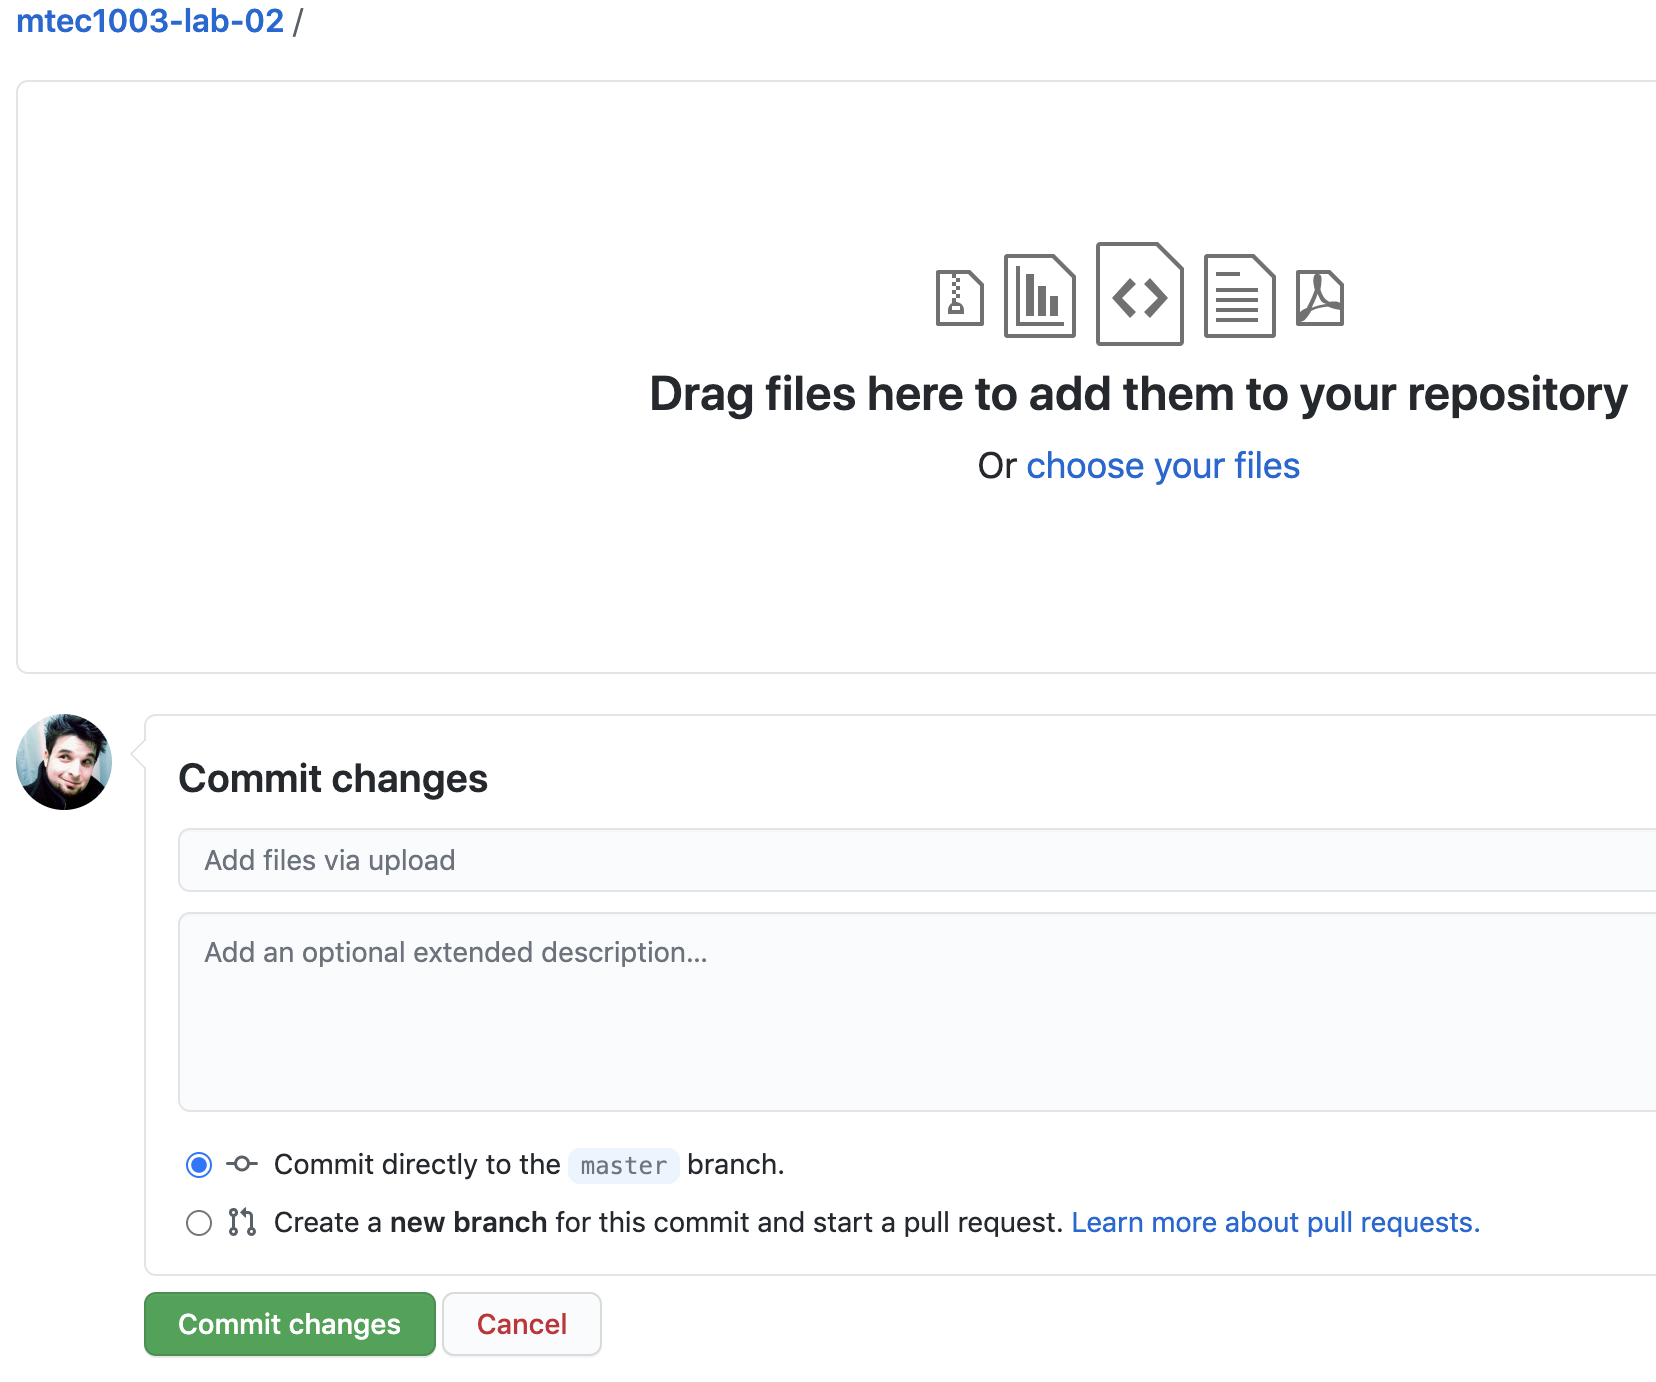
- You’ll then see an area of the screen where you can drag-and-drop files from your computer. Select all the files and folders you worked on this week, including those downloaded, then drag-and-drop them onto the screen. (Remember: all files you’ll need are contained in the /mtec1003-lab-02 folder on your computer. Simply “select all” of these files, or select them one and a time…). When finished, scroll down to the bottom where it reads, “Commit changes”. We’ll learn all about “commits” later, but for now, simply click the green “Commit changes” button:

- And that’s it! On the next screen you should see all the files in a list. Everything has been uploaded properly and is visible for grading. However, if you see something different, let the instructor know for troubleshooting…